


Composition / ingredients
Step-by-step cooking
Step 1:
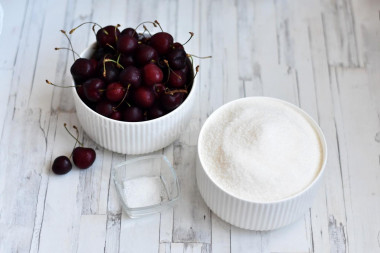
How to cook cherry jam without seeds for the winter? First, prepare the necessary ingredients. Cherries for jam can be used of any variety: burgundy, red-yellow, yellow or assorted. Citric acid may well be replaced with half a lemon, cut into quarters.
Step 2:

Pick the berries, removing the rotten ones. Wash the cherries thoroughly, dry them. Remove the tails and bones. The net weight of the prepared berries should be 1 kg, so take cherries with a margin. The bones can be removed using a special device or by cutting the berries with a knife to the bone and removing the bone with your fingers.
Step 3:
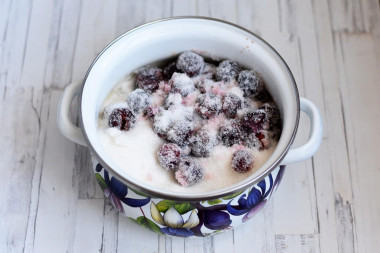
Put the berries in the pot in which you will cook the jam. Fill the berries with sugar and leave for 10 minutes to let the cherry juice. Since the cherries are very sweet, I use the ratio of berries and sugar 2:1. You can use a combination of 1:1, but it all depends on the sweetness of the cherries. If the berries are already very sweet, the jam will turn out to be cloying. If they are more neutral or even sour, then you can take as much sugar as berries.
Step 4:
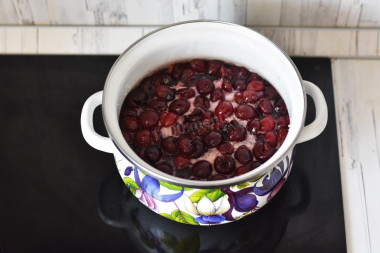
Send a pot of berries to a low heat. Periodically stirring the berries, bring the mass to a boil and cook for 5-7 minutes (if you need a thicker jam, then 15-20 minutes).
Step 5:
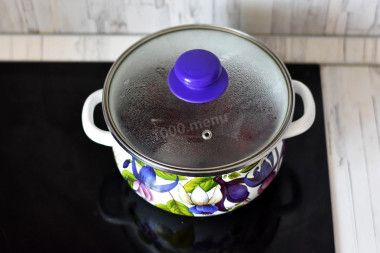
I covered the pan with a lid to speed up the boiling process. At the end, add citric acid to the jam and stir.
Step 6:
Wash the jars with lids inside and out and sterilize. This can be done by steaming or calcining cans in the oven. If you sterilize cans in the oven, then do not put them immediately in a hot oven, otherwise they will burst from the temperature difference. You need to put the cans in a cold oven on the grill so that they heat up gradually.
Step 7:

Put the finished hot jam into jars. If you need a very thick jam with a minimum amount of juice, then partially or completely leave the juice released during cooking in a saucepan.
Step 8:

Close the jars with lids. You can use screw caps, like mine, nylon or tin. In the latter case, you will have to close the banks with a seaming key. Turn the jars upside down, wrap them warmly and leave at room temperature until completely cooled. Store the jam in a cool dark place (refrigerator, cellar) all winter. Bon appetit!


So that summer supplies are guaranteed to delight you throughout the cold season, read the basic rules, secrets and life hacks about preparations for the winter.
Since the degree of salinity, sweetness, bitterness, sharpness, acid, burning is individual for everyone, always add spices, spices and seasonings, focusing on your taste! If you put some of the seasonings for the first time, then keep in mind that there are spices that it is especially important not to shift (for example, chili pepper).
Caloric content of the products possible in the composition of the dish
- Granulated sugar - 398 kcal/100g
- Sugar - 398 kcal/100g
- Cherry - 50 kcal/100g
- Citric acid - 0 kcal/100g