


Composition / ingredients
Step-by-step cooking
Step 1:
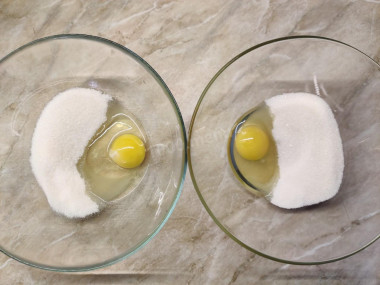
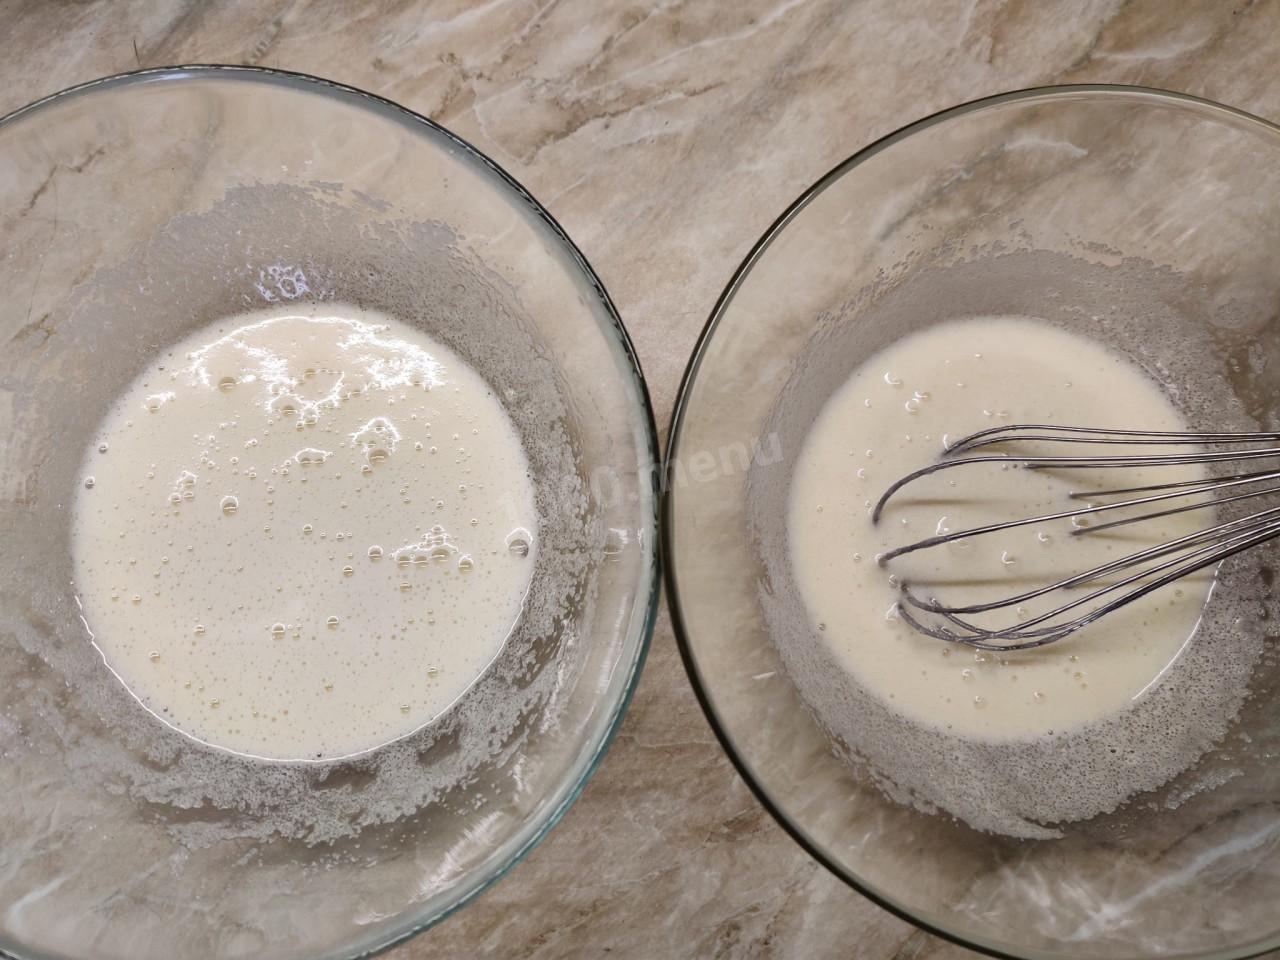
Both types of dough (chocolate and white) will be cooked at the same time, like real pros! If you don't feel so confident in yourself, you can first prepare one, and then another dough. It's up to you to decide which one to start with. So, take two bowls. In each, beat in a chicken egg and pour sugar. Add salt and vanilla sugar. Salt will enrich the taste of the future pie.
Step 2:

With a whisk, alternately mix both mixtures for a couple of minutes until light bubbles form. It is not necessary to achieve complete dissolution of sugar at this stage, it will still have time to melt.
Step 3:

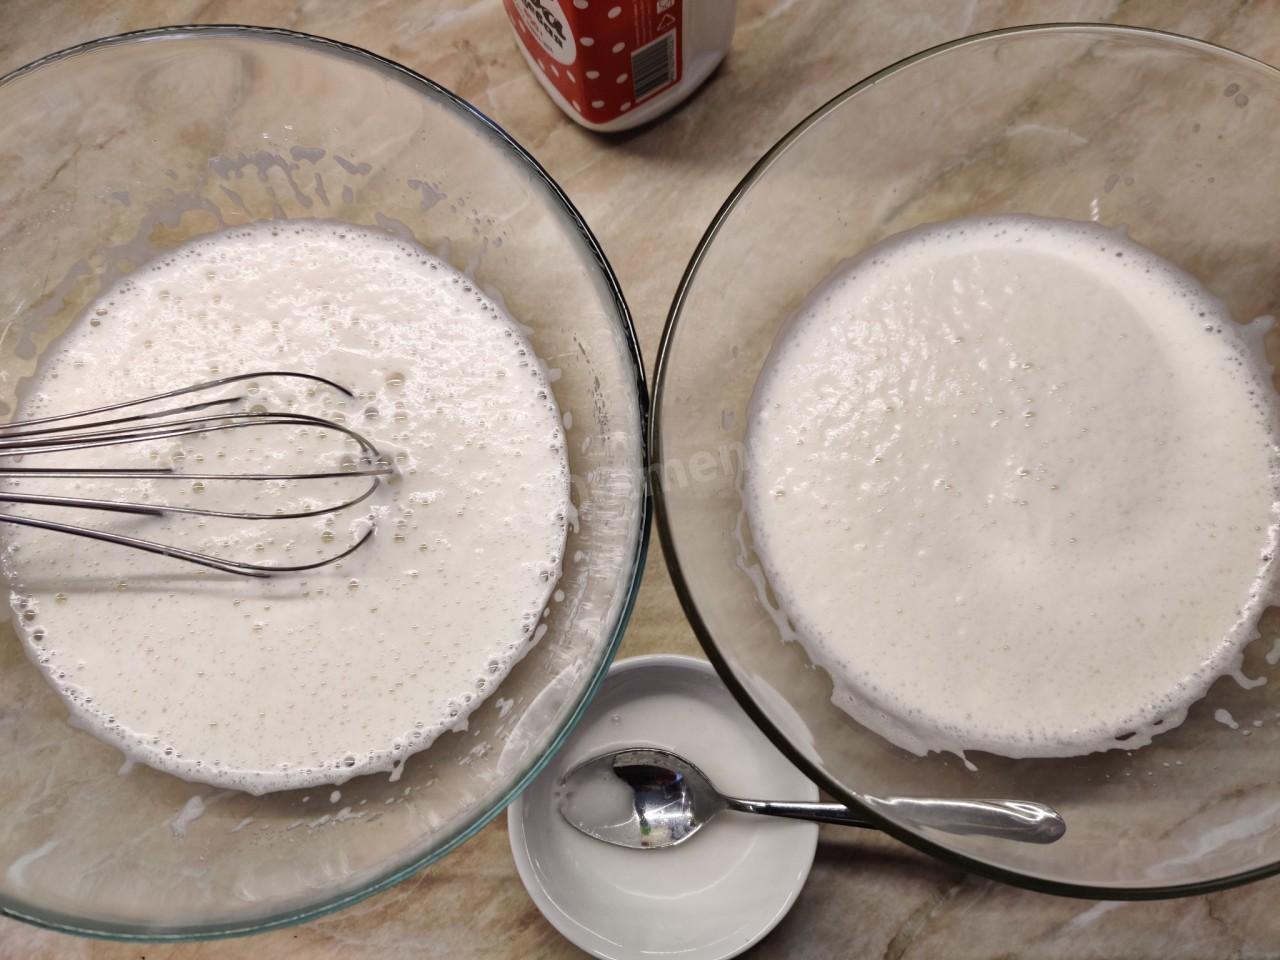
Pour in the milk. It can be both cold and room temperature. I used milk with a 3.2% fat percentage. The taste of the pie will also depend on the fat content of the milk. As for evil, the harsh law "The fatter, the tastier" works here too… Mix both mixtures alternately with a whisk again.
Step 4:

In a small bowl, pour the entire volume of soda (intended for two types of dough) and extinguish it with the entire volume of lemon juice. Spread the soda evenly between two bowls with a teaspoon. If a little less gets into one bowl and a little more soda gets into the other, then absolutely nothing terrible will happen. Soda is quenched with lemon in order for the pastry to rise well, be lush and completely baked inside.
Step 5:

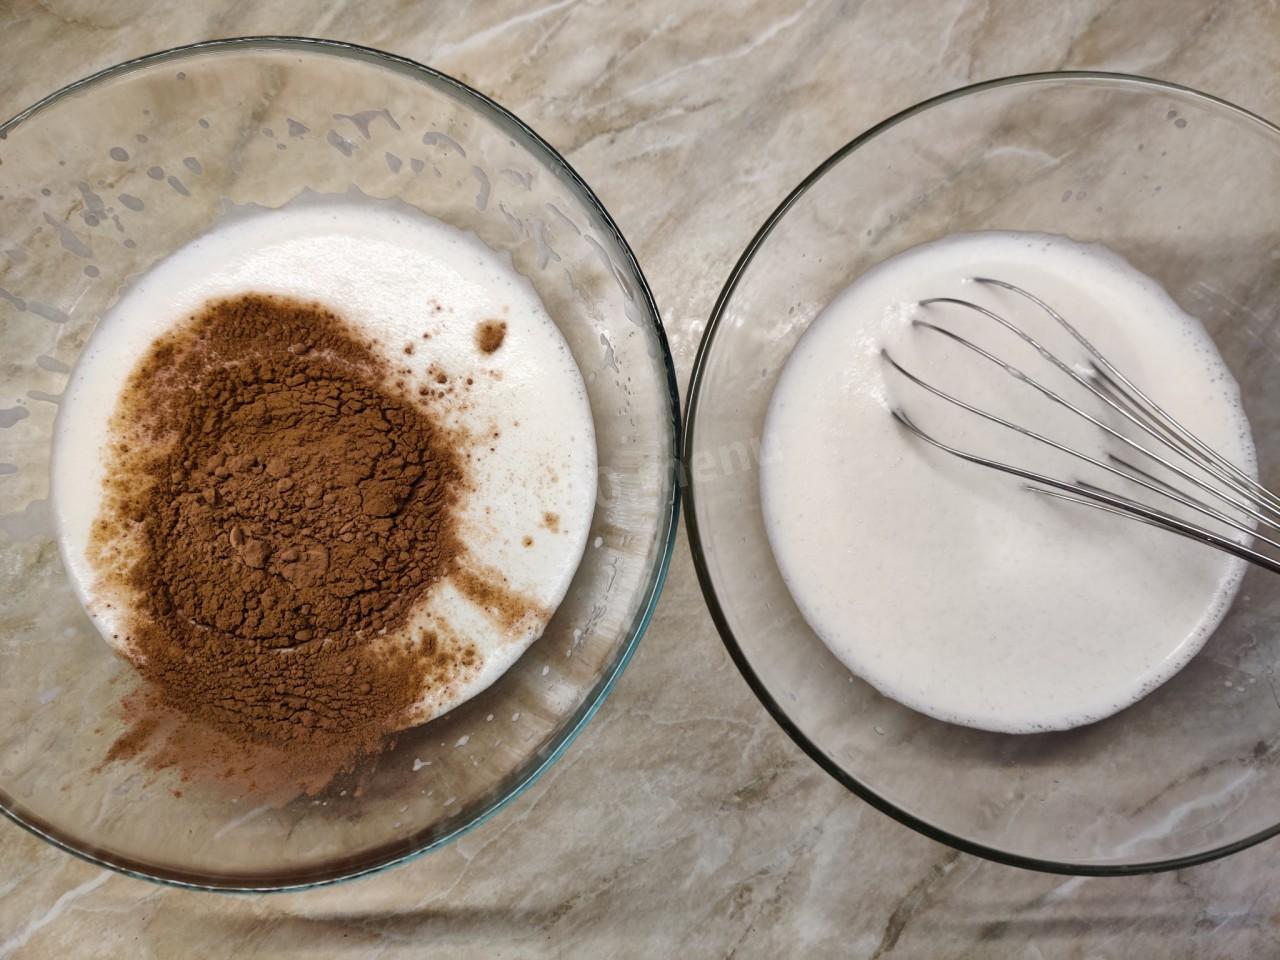
Add cocoa to the future chocolate dough. It would be better to sift it through a strainer to break up the lumps. It is not necessary to stir yet, so as not to stain the whisk. This is not laziness, but a rationalizing idea :) At this stage, we do not add anything to the white dough, it skips the course.
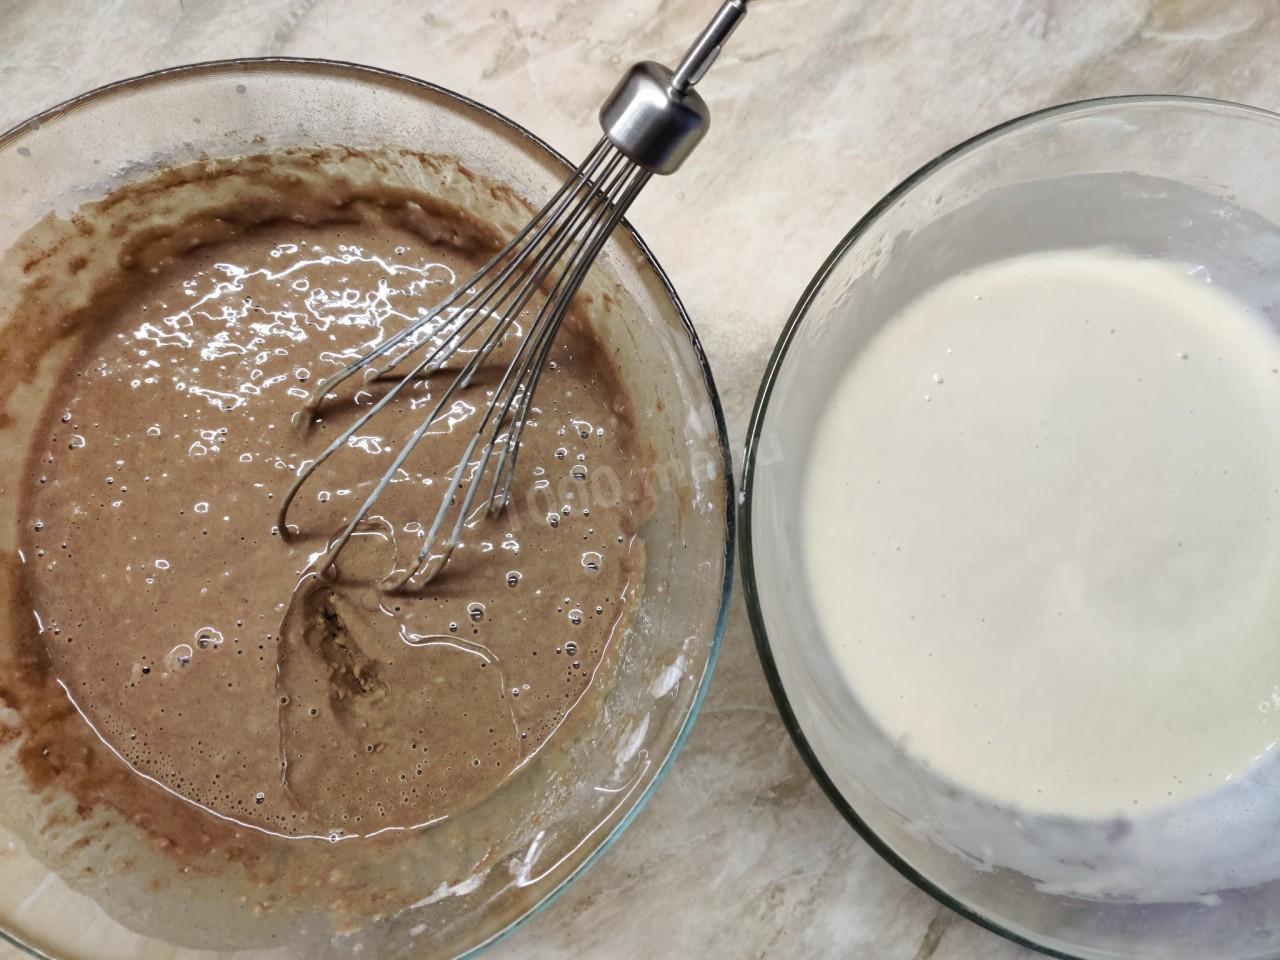
Step 6:

Sift the flour into the white dough in parts, stirring the mixture with a whisk. At the very end, add the sunflower oil and stir again. The white dough is ready! Also, sift the flour into the chocolate dough in parts, mix until smooth, and at the end stir in sunflower oil. The chocolate dough is ready! Flour you can take more / less. Be guided by the test. It should turn out smooth due to the oil and a little runny, so that it flows freely from the spoon.
Step 7:

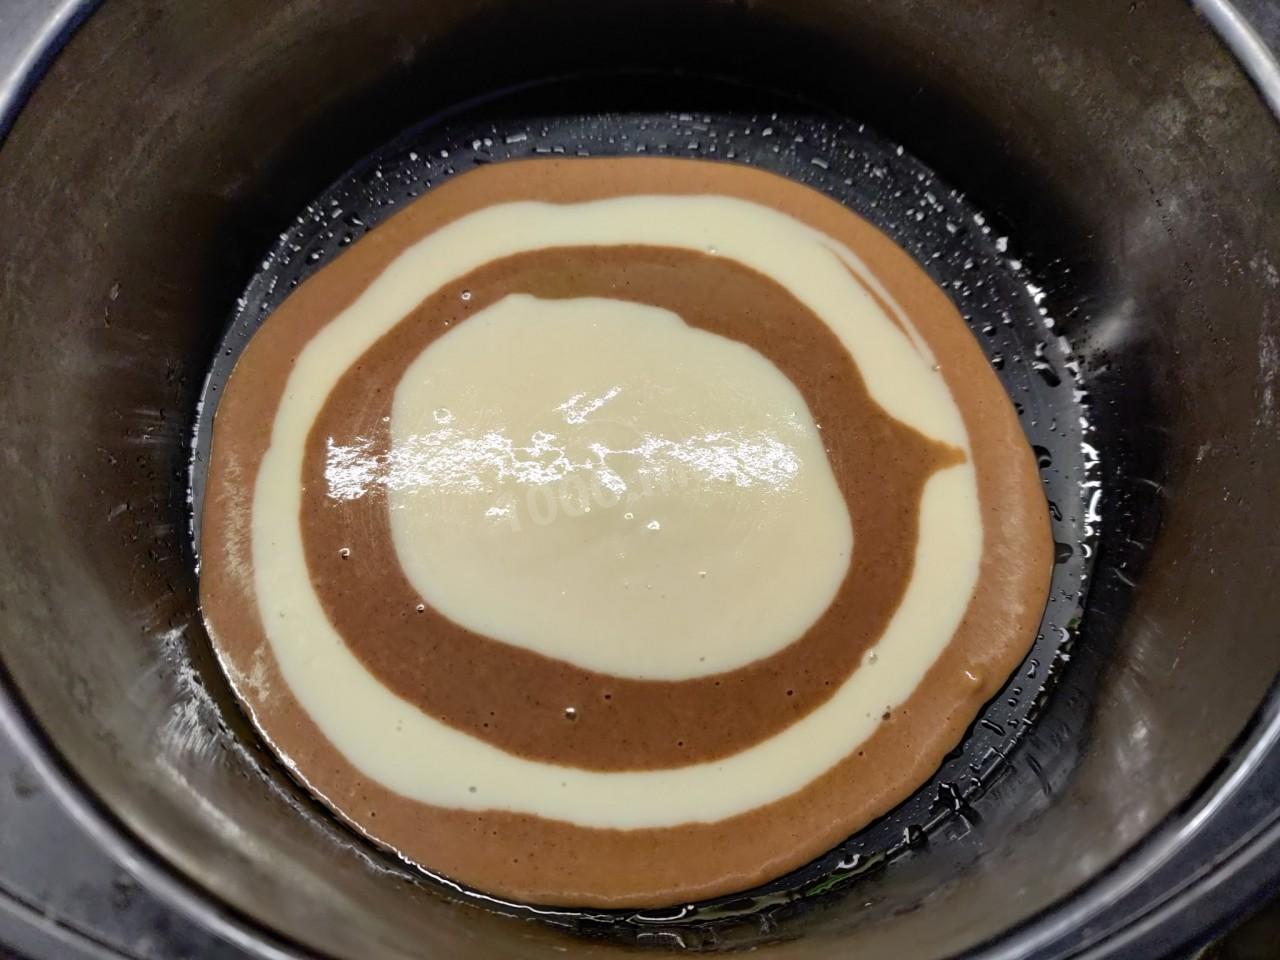
Grease the bottom of the baking dish with a drop of sunflower oil, so that it is easier to take out the pie later. I have a round silicone mold with a diameter of 22 cm. Take two tablespoons. One for white, the other for chocolate dough. Now you need to pour the dough one tablespoon at a time into the very center of the mold, alternating between chocolate and white dough. A spoonful of chocolate, then a spoonful of white, and so on until all the dough is finished.
Step 8:
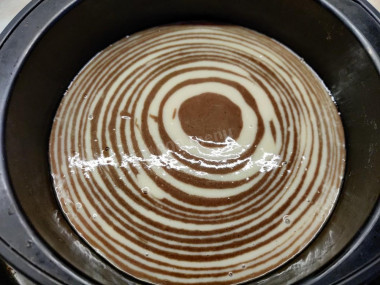
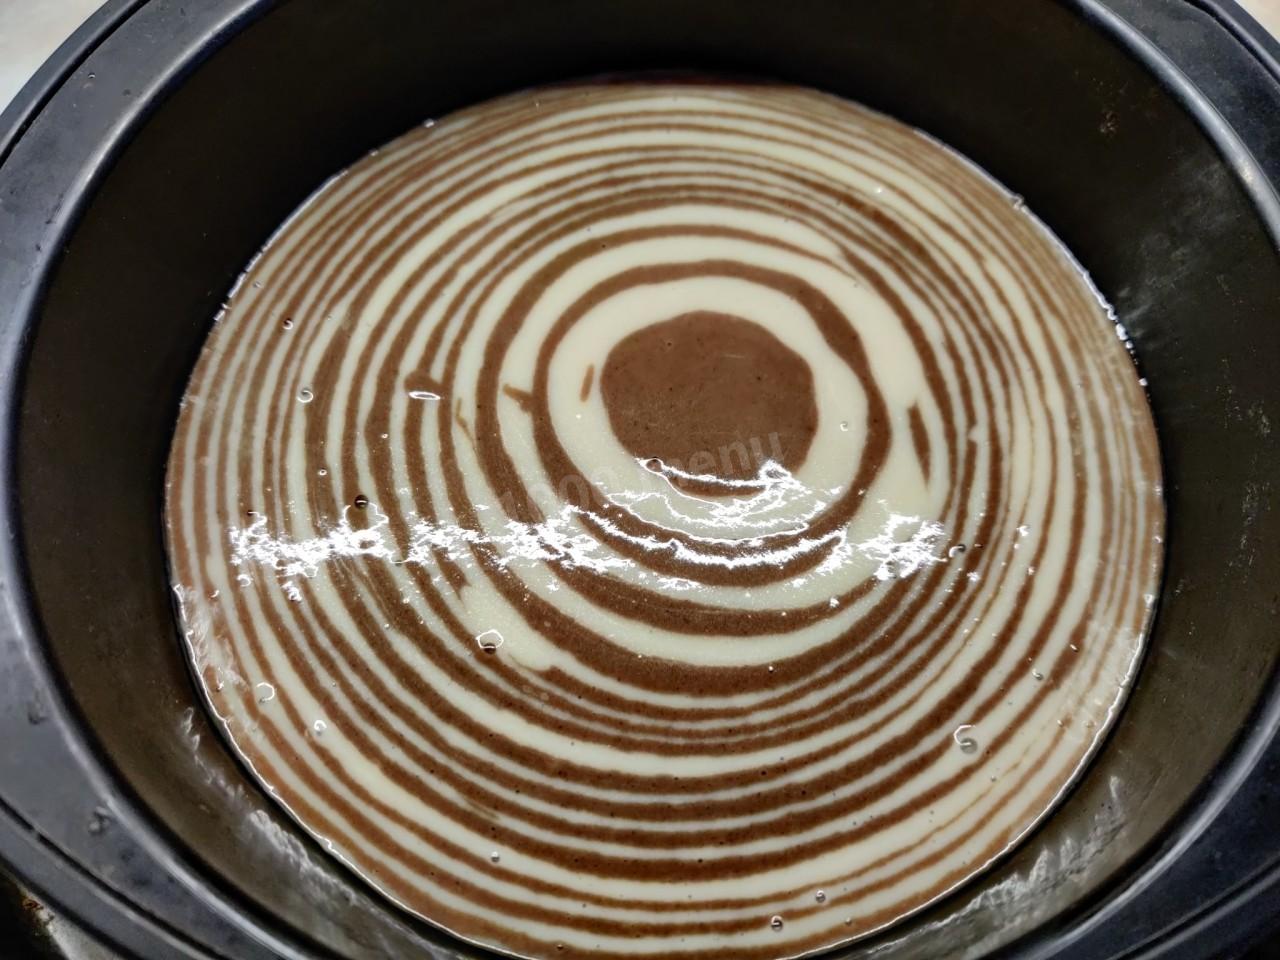
This is how my pie looks before the final stage. The circles are clearly visible. For me, the process of pouring out the dough was quite tedious, but it is due to this technology that a beautiful pie pattern is achieved. By the way, it seems to me that if the last spoon is with chocolate dough, then the pie, in general, will look more advantageous.
Step 9:
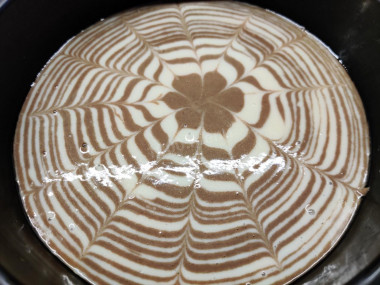
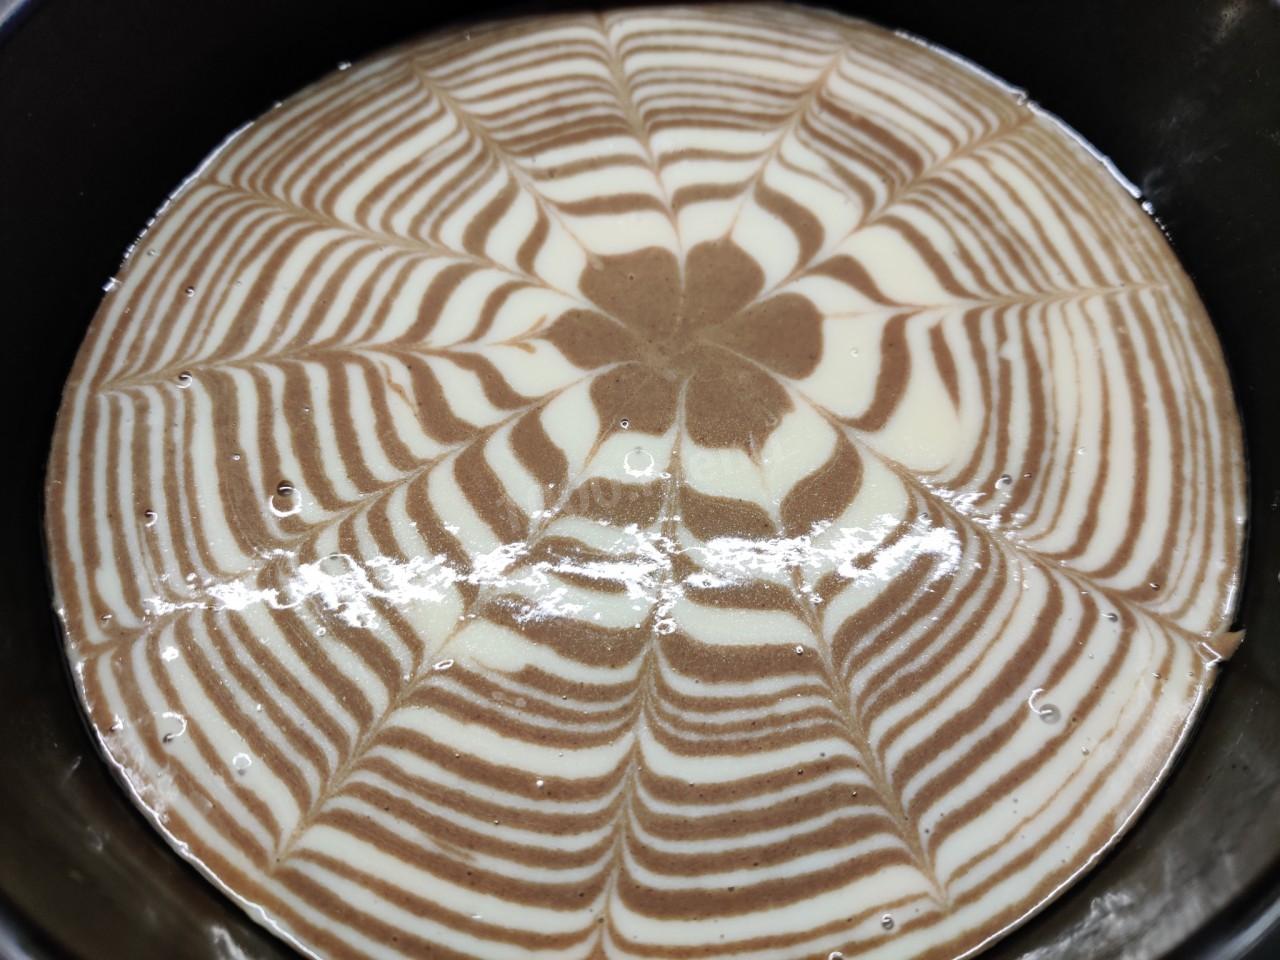
You can decorate the top of the cake with an intricate pattern. With a regular toothpick, swipe a few rays from the center to the edges. And then between these rays make a few more, just the opposite: from the edges to the center. Bake the pie in a preheated 180 degree oven for half an hour or forty minutes, depending on the oven. Check readiness with a toothpick. If you pierce the very center of the pie, the toothpick should remain dry.


The pie turned out to be very elegant. The cut is a separate story! The layers are well visualized, in fact resembling the color of a zebra. The pie rose perfectly and baked well. Well, it tastes like the most ordinary cupcake! Do not expect anything supernatural from the Zebra.
Plus, personally, I didn't have enough sweets. You can either increase the amount of sugar in the dough, or just serve the pie, for example, with condensed milk or jam.
Bon appetit!
Be prepared for the fact that flour may need more or less than indicated in the recipe. Focus not on the amount of flour, but on the desired consistency of the dough. To avoid mistakes, read about flour and its properties!
Keep in mind that everyone's ovens are different. The temperature and cooking time may differ from those specified in the recipe. To make any baked dish successful, use useful information about the features of ovens !
Caloric content of the products possible in the composition of the dish
- Whole cow's milk - 68 kcal/100g
- Milk 3.5% fat content - 64 kcal/100g
- Milk 3.2% fat content - 60 kcal/100g
- Milk 1.5% fat content - 47 kcal/100g
- Concentrated milk 7.5% fat content - 140 kcal/100g
- Milk 2.5% fat content - 54 kcal/100g
- Chicken egg - 157 kcal/100g
- Egg white - 45 kcal/100g
- Egg powder - 542 kcal/100g
- Egg yolk - 352 kcal/100g
- Ostrich egg - 118 kcal/100g
- Granulated sugar - 398 kcal/100g
- Sugar - 398 kcal/100g
- Vegetable oil - 873 kcal/100g
- Cocoa powder - 374 kcal/100g
- Salt - 0 kcal/100g
- Lemon juice - 16 kcal/100g
- Wheat flour - 325 kcal/100g
- Baking soda - 0 kcal/100g
- Vanilla sugar - 379 kcal/100g