

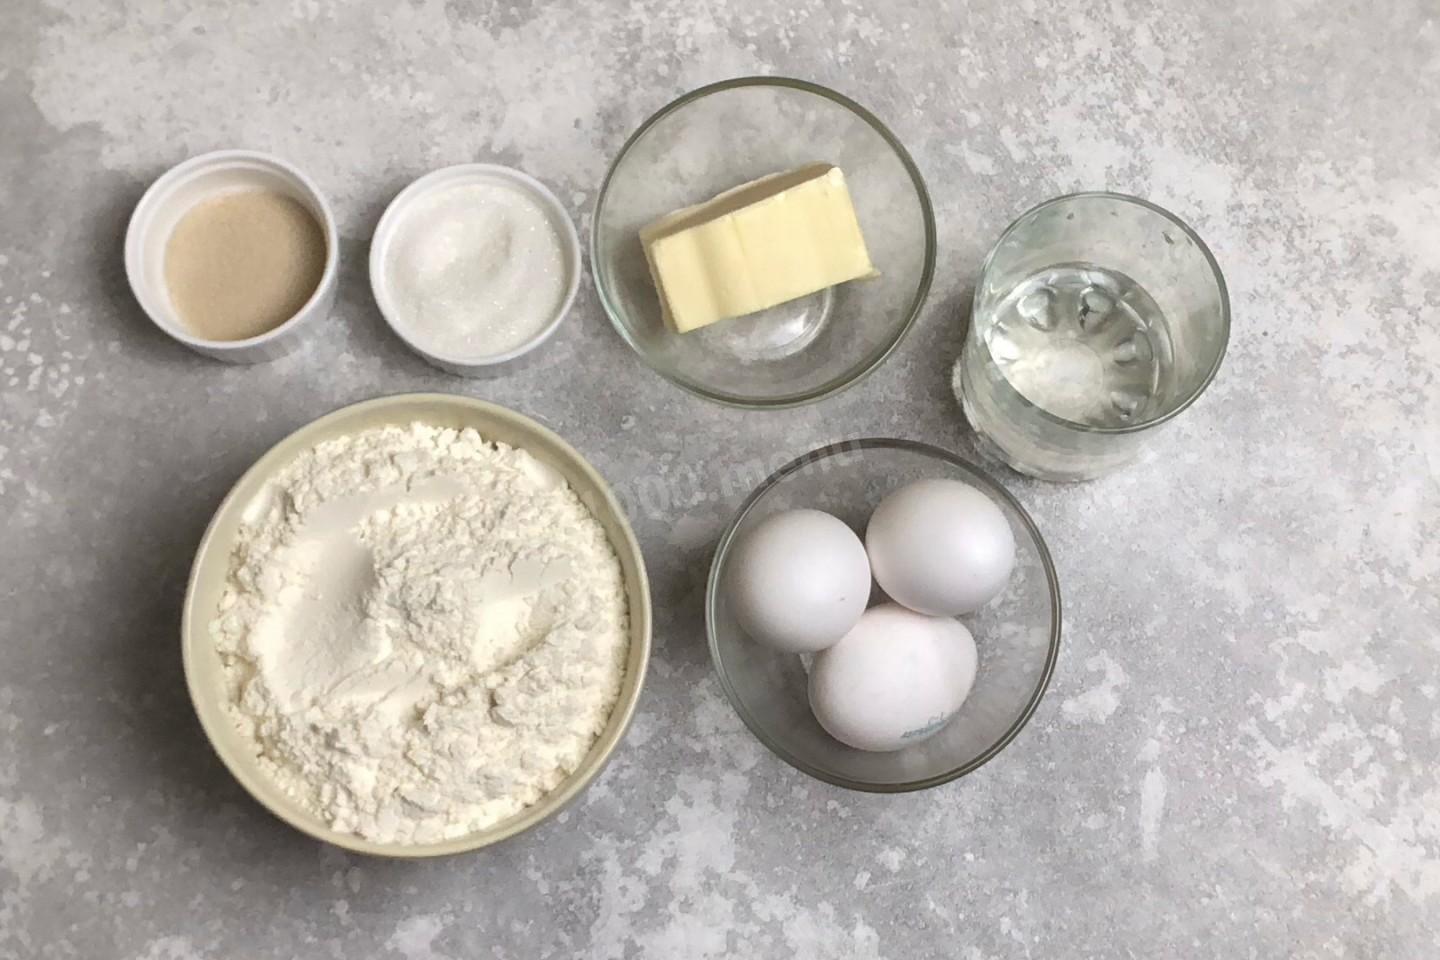
Composition / ingredients
Step-by-step cooking
Step 1:

How to make homemade brioche buns? Prepare the products. Take the oil of the best quality, without the addition of vegetable fats, corresponding to GOST. Important!!! Before cooking, remove the water and oil in the freezer for at least half an hour. They should be icy!
Step 2:
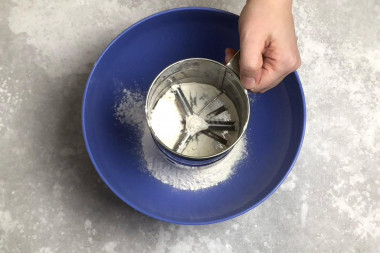
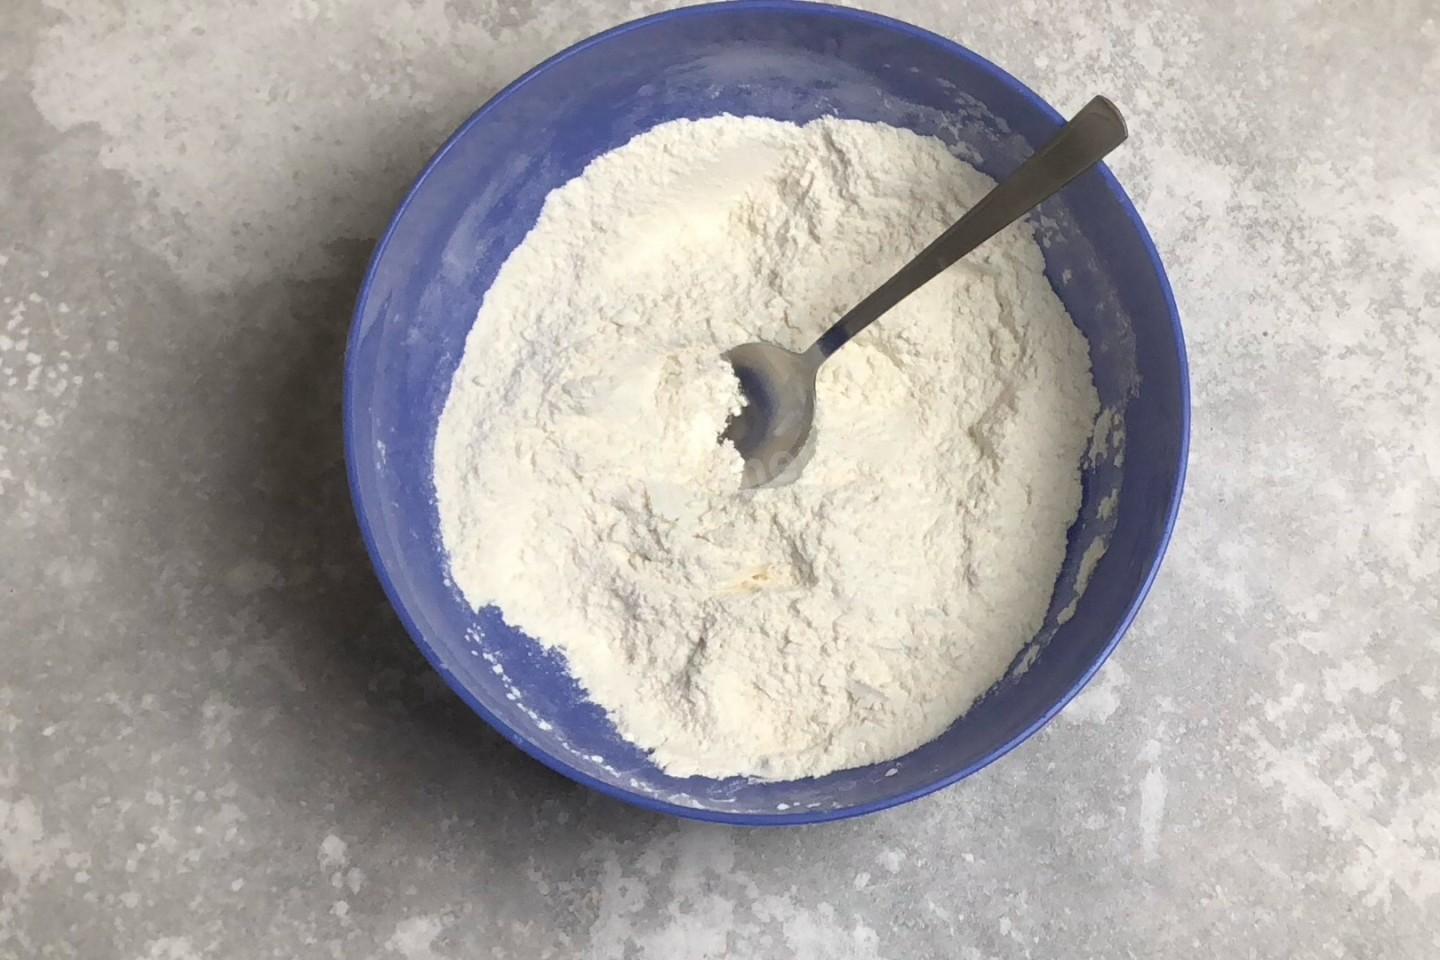
Sift the flour into a large bowl in which you will knead the dough. This process will not only remove possible debris from the flour, but also enrich it with oxygen, which will make the baking more lush and airy.
Step 3:
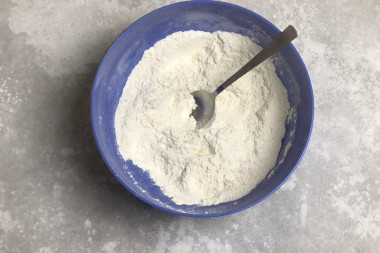
Add dry ingredients to the flour — yeast, salt and sugar. Mix them well.
Step 4:
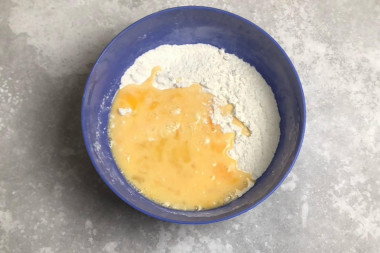
Next, break the eggs into a separate bowl. Be sure to wash the eggs before use, as even the seemingly clean shell may contain harmful bacteria. It is best to use food detergents and a brush. Shake the eggs to disperse the yolk. Add ice water to them, mix. Pour the egg mixture into the flour.
Step 5:
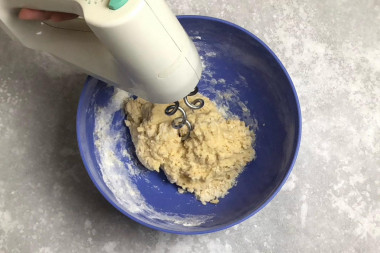
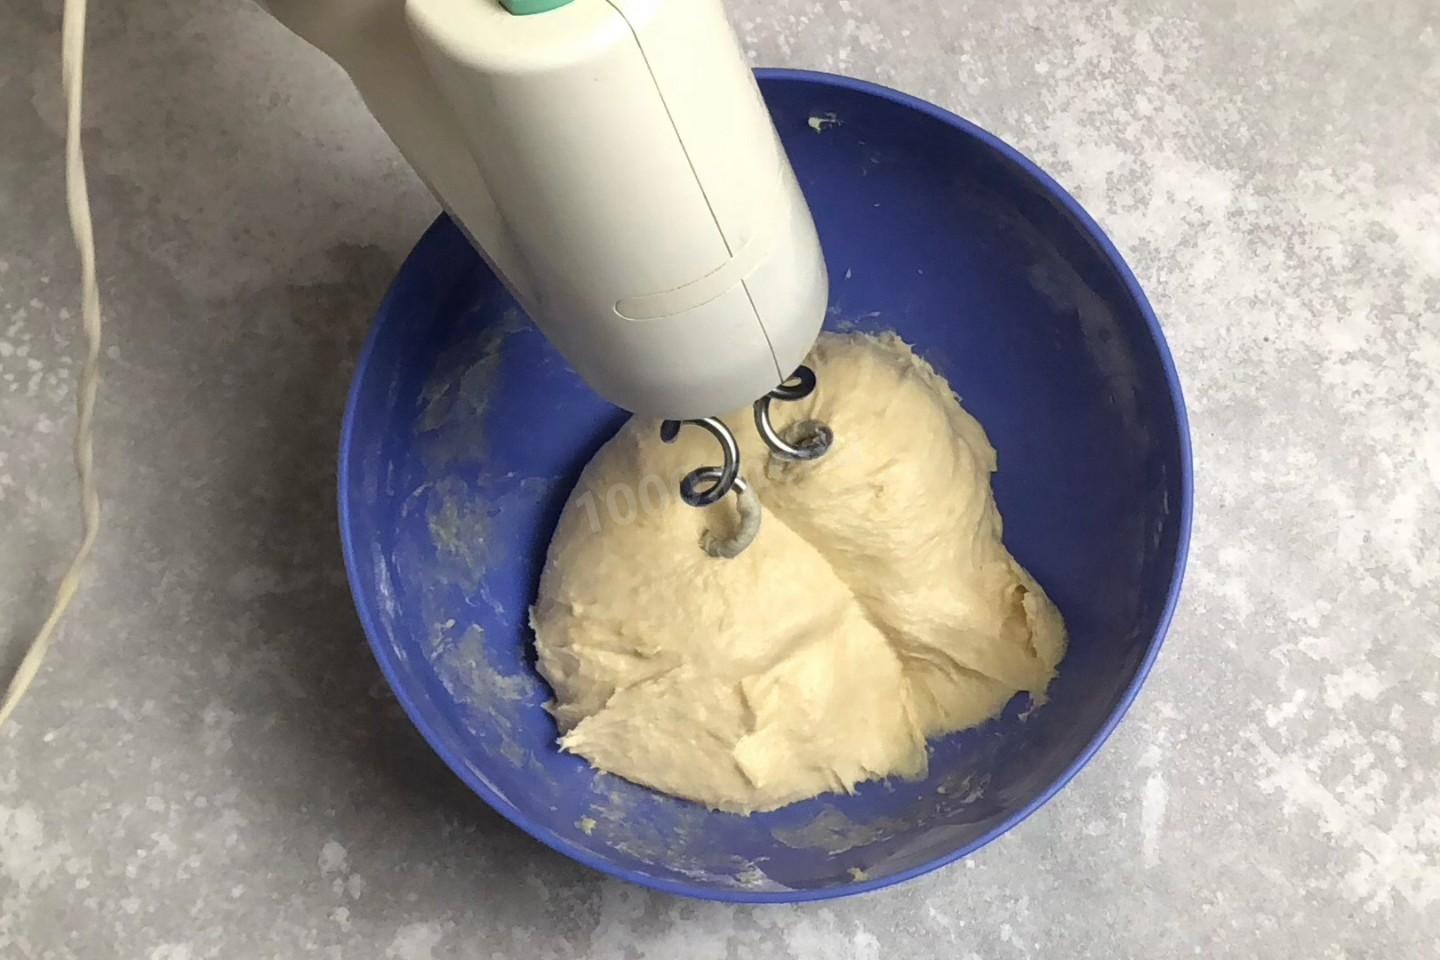
Start kneading the dough. I'll make a reservation right away that the dough is very tight, so I don't advise doing it with your hands. It is better to use a mixer. At the first stage of kneading, our goal is simply to mix flour and eggs.
Step 6:

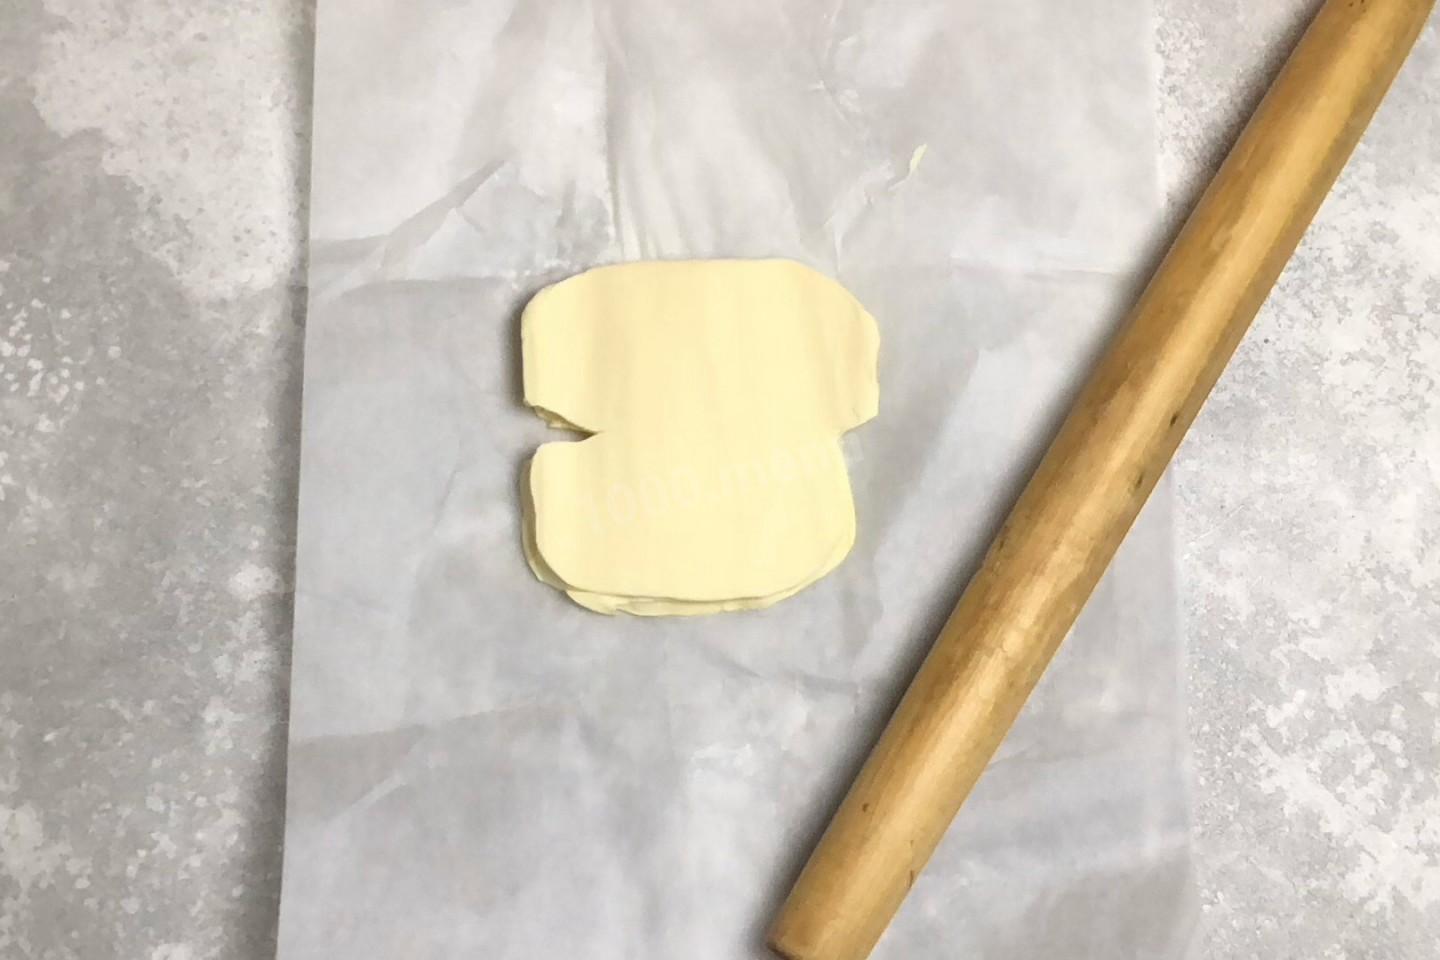
Take the butter out of the freezer, wrap it in parchment and beat it hard with a rolling pin. It should turn into a flat pancake, soft as plasticine. Do not touch it with your hands, the colder the butter, the better the dough will turn out in the end.
Step 7:
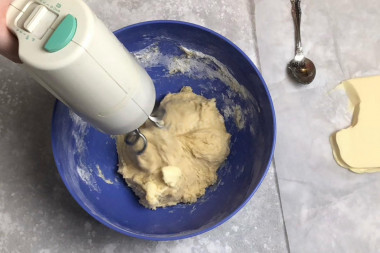
Start adding butter to the dough by teaspoon. Added, mixed, the next one. Again, I strongly recommend a mixer.
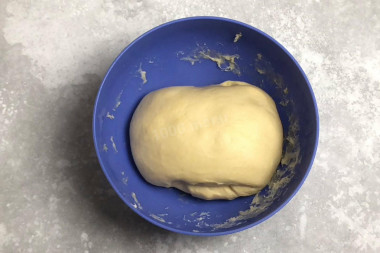
Step 8:

When all the oil is added, the dough will soften, kneading will become easier. Continue kneading with a mixer. The dough will gradually begin to lag behind the walls. Stop, collect the dough from the walls with a spatula and continue kneading. The dough will be finally ready when it gathers into a ball.
Step 9:

Cover the bowl with a towel or cling film and leave to rise for 1 hour.
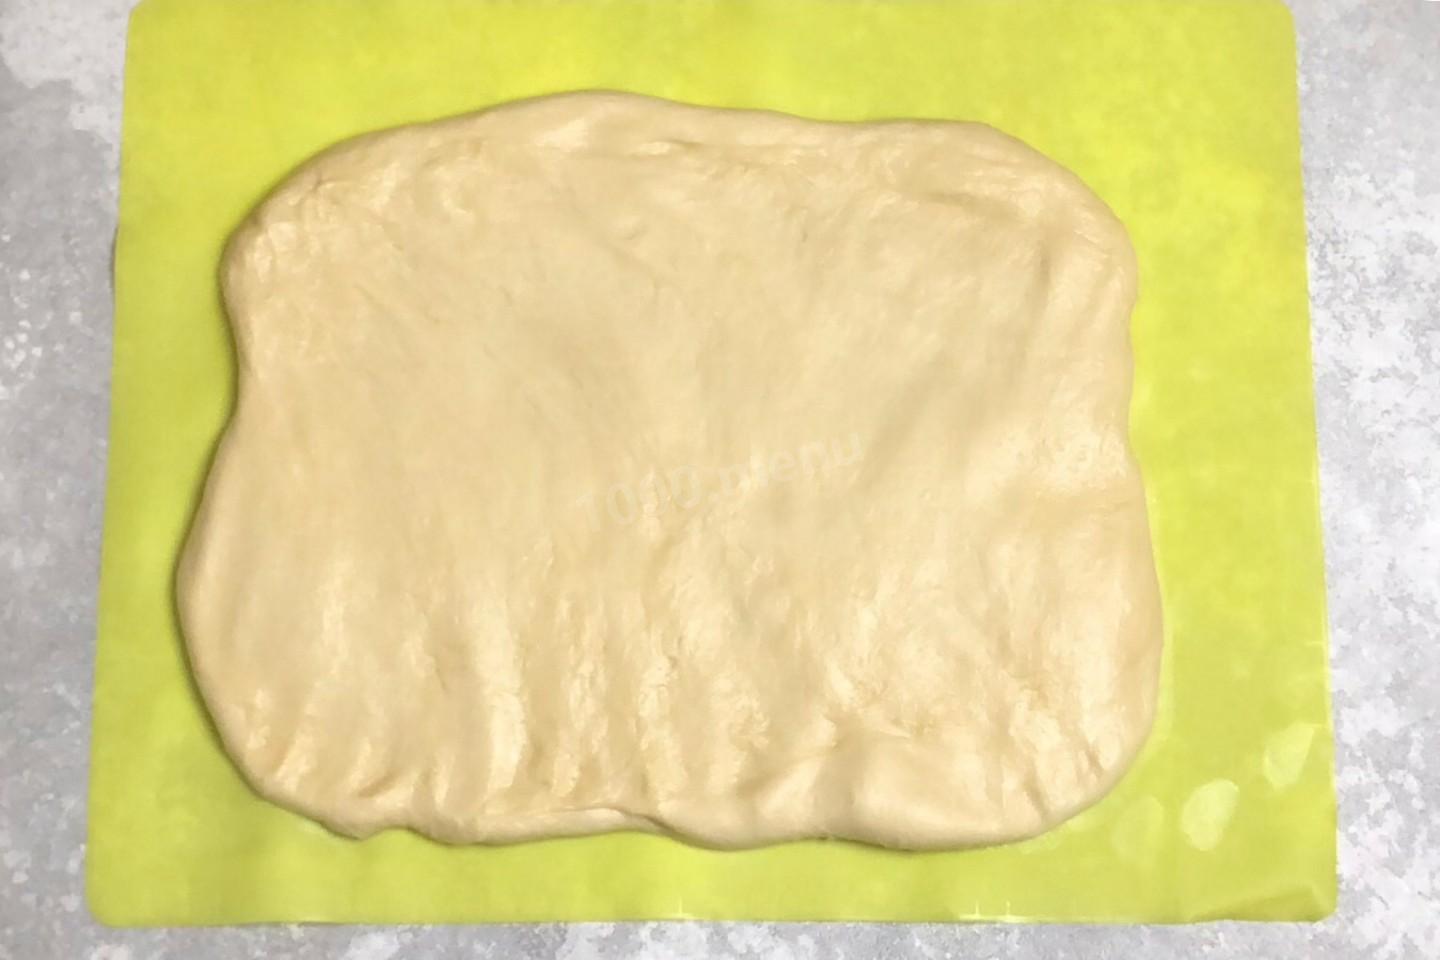
Step 10:
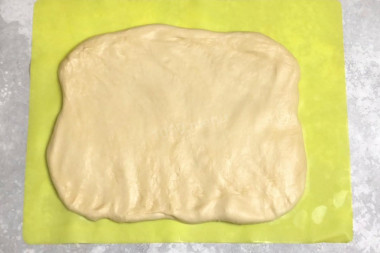
After an hour, the dough will noticeably increase in volume. Put it on your desktop. There is no need to dust the surface with flour, the dough is not sticky due to the large amount of oil. With your hands, spread it into a layer about 1 cm thick.
Step 11:
Fold the dough: first, on the long side of each other according to the type of euroconvert, then on the short side.
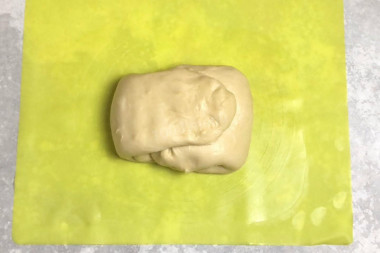
Step 12:
Put the dough in the refrigerator for at least 8 hours. If you have it for 12, it's not scary, but you don't need less than 8.
Step 13:
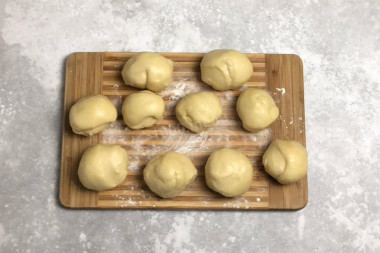
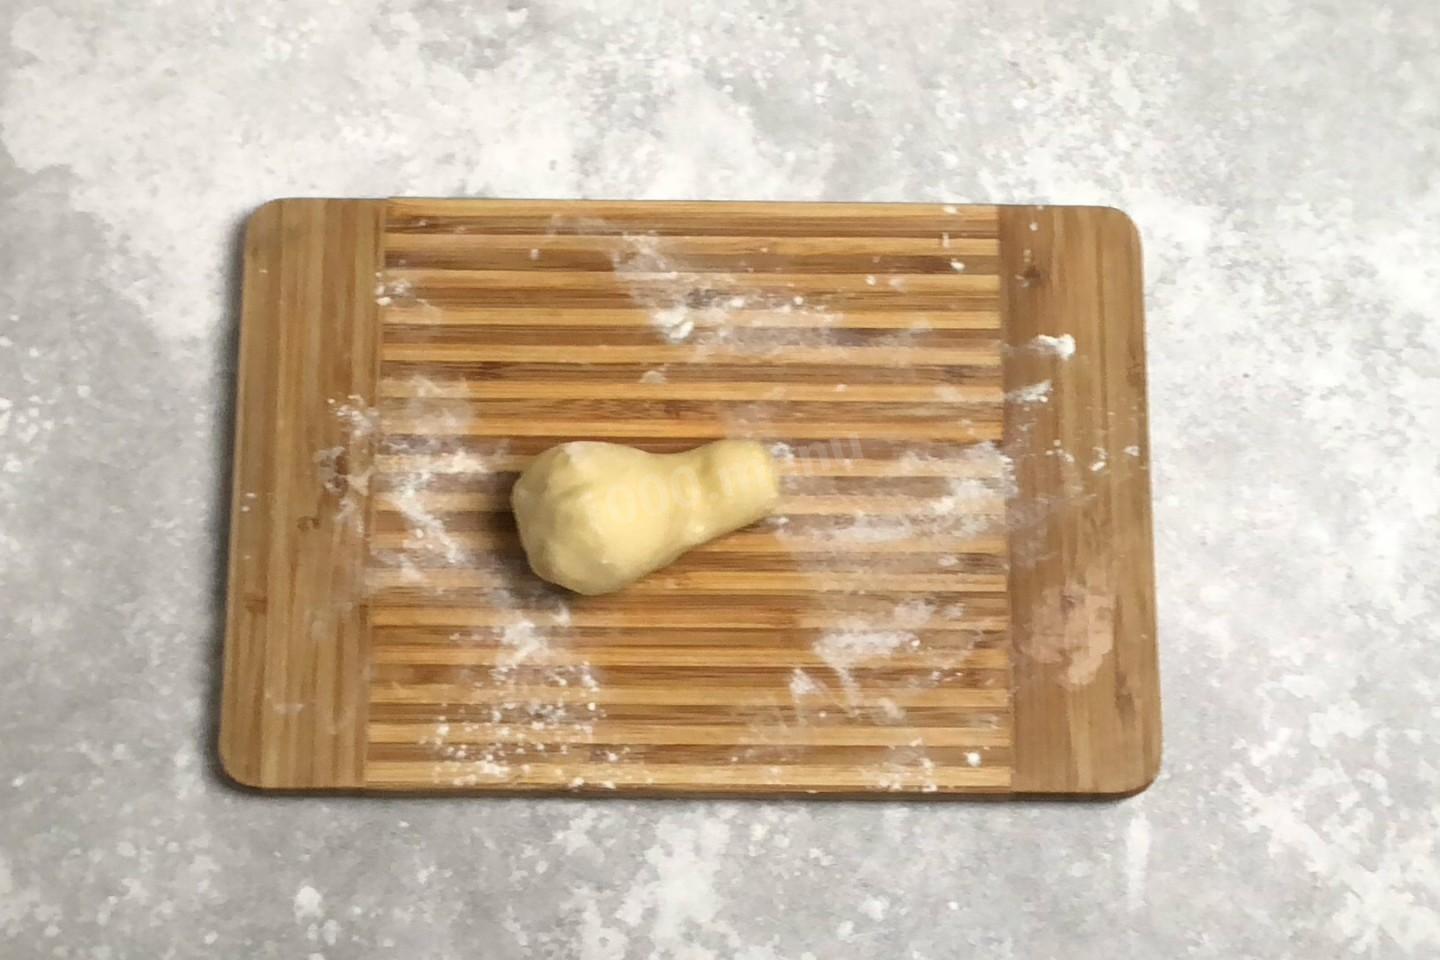
After 8 hours in the cold, the dough will become firm, but it will still grow in volume. It is very convenient to work with him. Divide it into identical pieces, which quickly roll into balls. Speed is important so that the oil does not start to melt from the heat of the hands. I got 10 pieces.
Step 14:

Form buns. Roll the ball with the edge of your palm, as if separating a third — you will get a "pin".
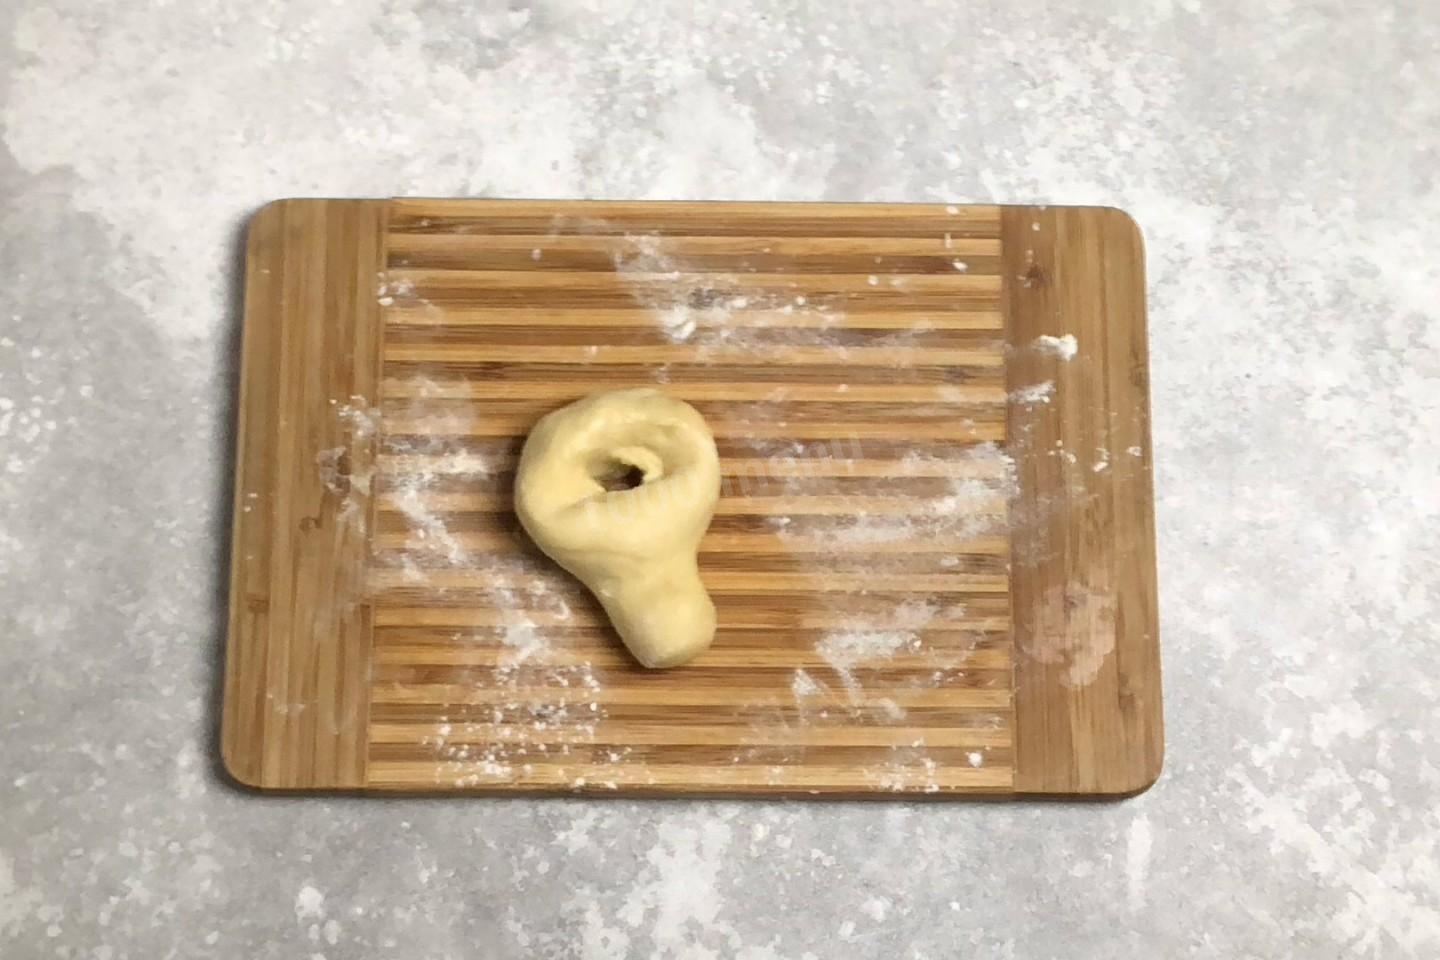
Step 15:

Make a hole in the thick part with your thumbs.
Step 16:
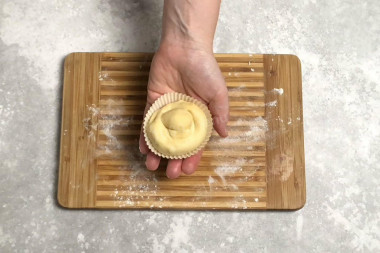
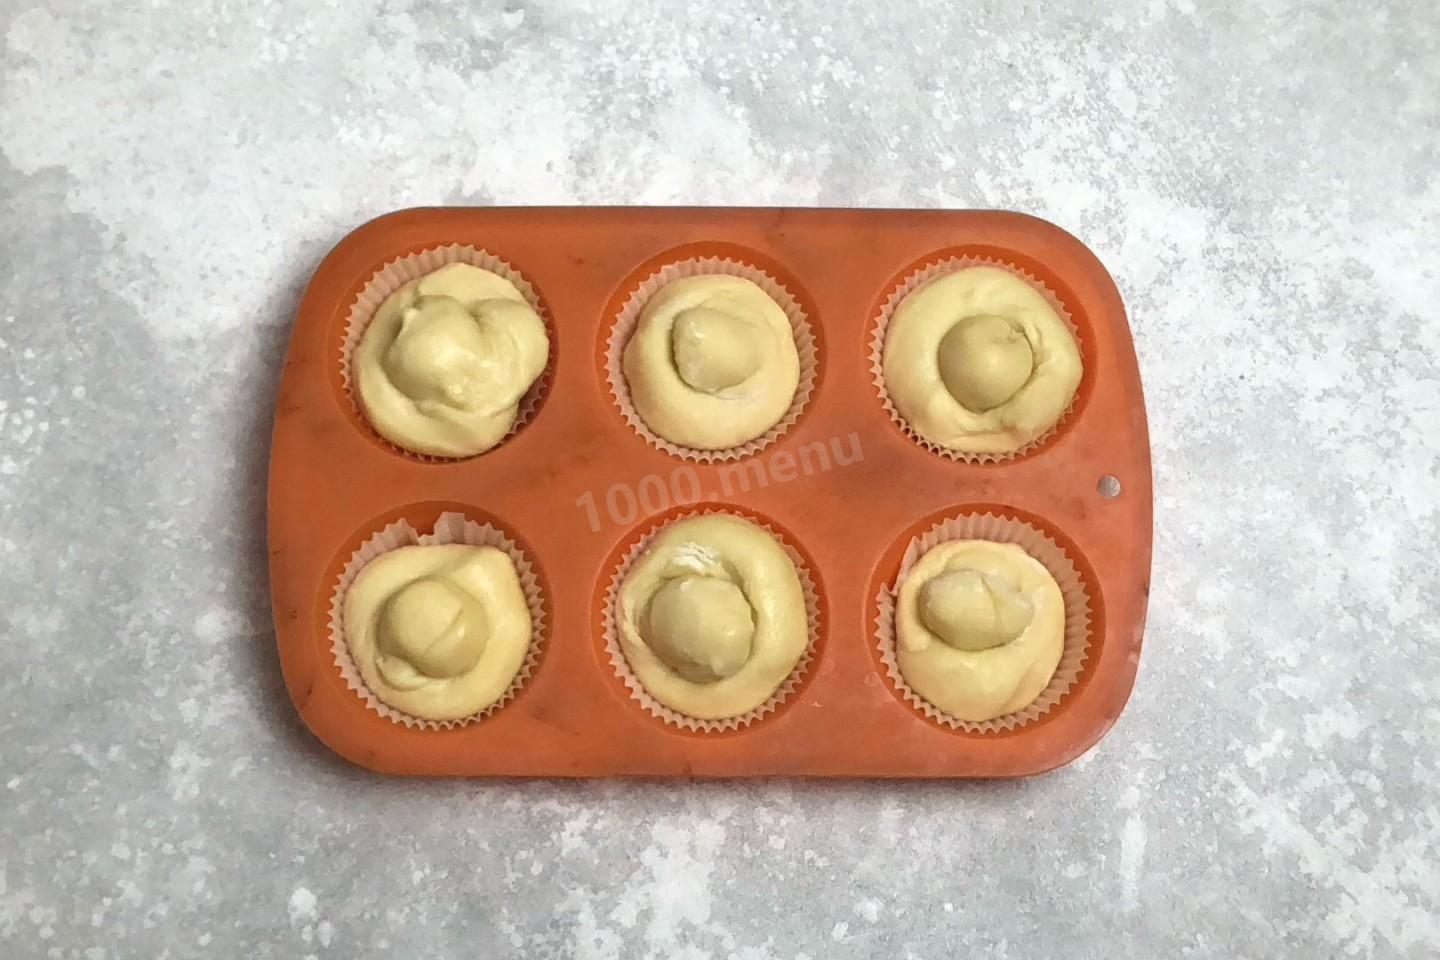
And push a small ball into it from the bottom. Put the blank in a paper mold. This will allow the bun to grow properly without spreading. Instead of paper, you can take any cupcake molds. Similarly, form brioches from all the balls. I put the blanks in paper molds in a silicone cupcake mold.
Step 17:
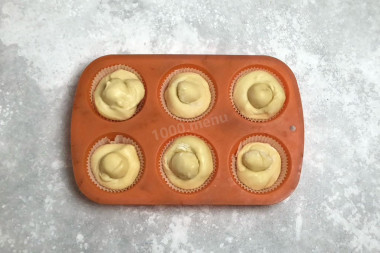
Remove the blanks for proofing in a warm place for an hour and a half. I put it in the oven with the light bulb on.
Step 18:
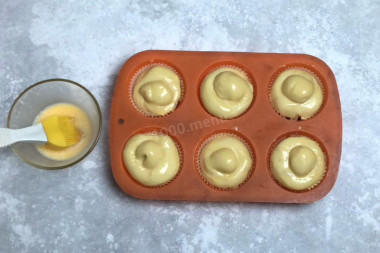
In due time, the buns will rise. Lubricate them with a loosened yolk.
Step 19:
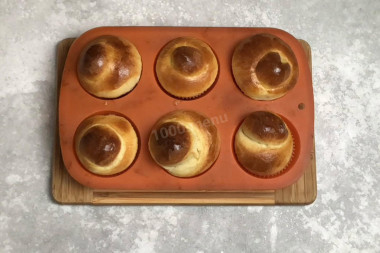
Bake the buns for 20 minutes at 190 degrees until golden brown. Remove the finished rolls from the oven, cool slightly and serve to the table. They are especially good when warm. Bon appetit!


Be prepared for the fact that you may need more or less flour than indicated in the recipe. Focus not on the amount of flour, but on the desired consistency of the dough. To avoid mistakes, read about flour and its properties!
Keep in mind that everyone's ovens are different. The temperature and cooking time may differ from those specified in the recipe. To make any baked dish successful, use useful information about the features of ovens !
So that the oven has time to heat up to the desired temperature, turn it on in advance (10-20 minutes before the start of cooking).
Calorie content of the products possible in the dish
- Chicken egg - 157 kcal/100g
- Egg white - 45 kcal/100g
- Egg powder - 542 kcal/100g
- Egg yolk - 352 kcal/100g
- Ostrich egg - 118 kcal/100g
- Whole durum wheat flour fortified - 333 kcal/100g
- Whole durum wheat flour, universal - 364 kcal/100g
- Flour krupchatka - 348 kcal/100g
- Flour - 325 kcal/100g
- Granulated sugar - 398 kcal/100g
- Sugar - 398 kcal/100g
- Butter 82% - 734 kcal/100g
- Amateur unsalted butter - 709 kcal/100g
- Unsalted peasant butter - 661 kcal/100g
- Peasant salted butter - 652 kcal/100g
- Melted butter - 869 kcal/100g
- Salt - 0 kcal/100g
- Water - 0 kcal/100g
- Egg yolks - 352 kcal/100g
- Dry yeast - 410 kcal/100g