
Composition / ingredients
Step-by-step cooking
Step 1:
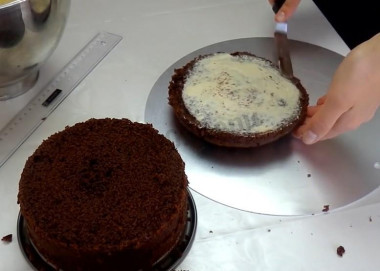
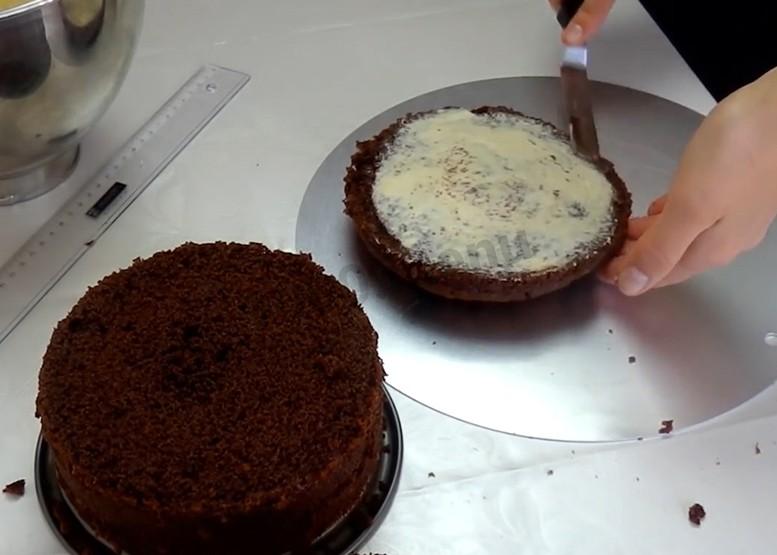
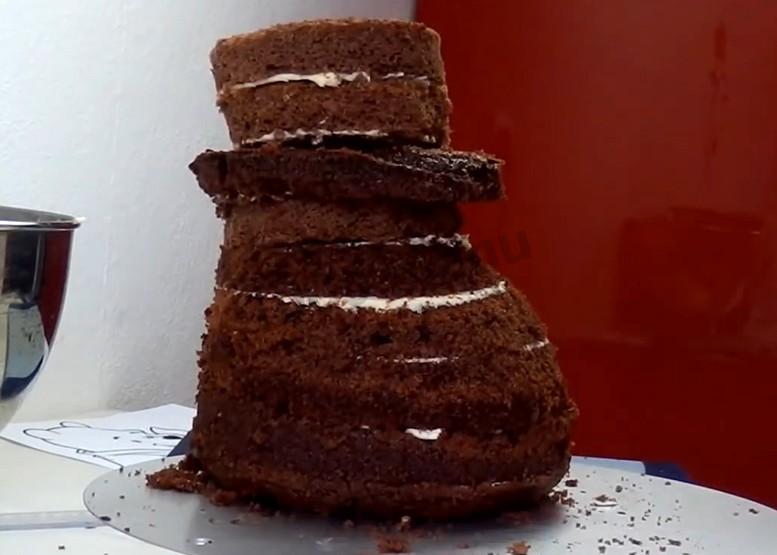
3 biscuits are needed for this cake. Two of them are 16 cm in diameter, 7 cm high. The third one is 26 cm in diameter, 2 cm high. Cut the smaller biscuits lengthwise into three cakes. And you can start assembling. Smear the base on top with a thin layer of butter cream with condensed milk and lay the next biscuit layer.
Step 2:
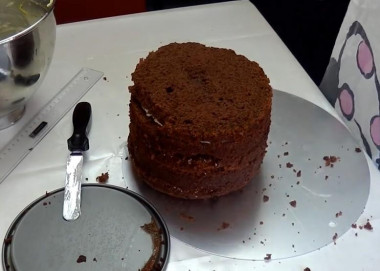
So on, part by part, smearing with a thin layer for greater stability, from five cakes to form the body of the future Fluff. Leave one cake for the head.
Step 3:
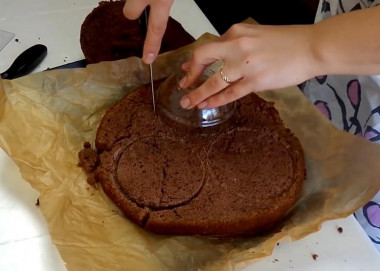
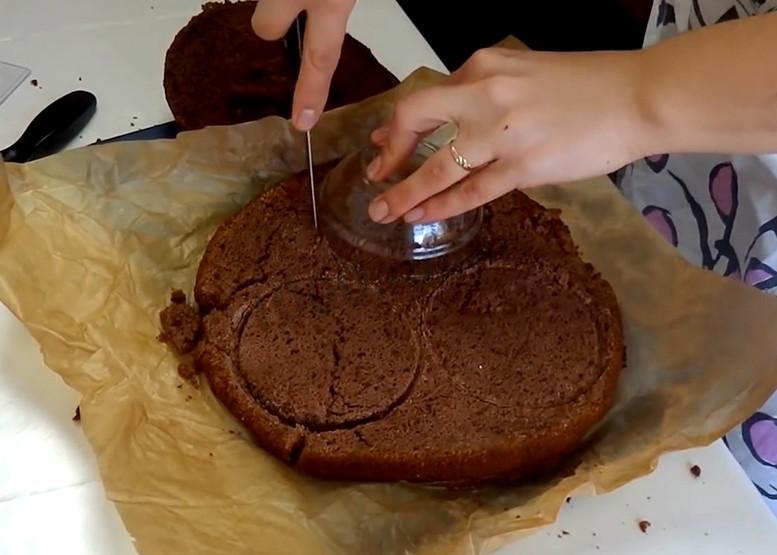
From a larger sponge cake, cut three cakes of 10 cm in diameter. All leftovers from the cakes should be set aside separately for further use in the preparation of the cake.
Step 4:
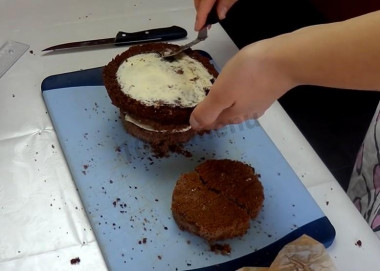
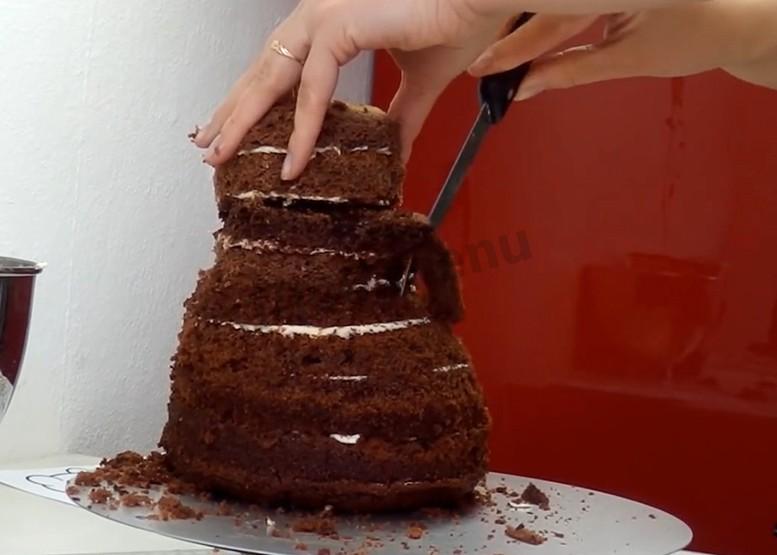
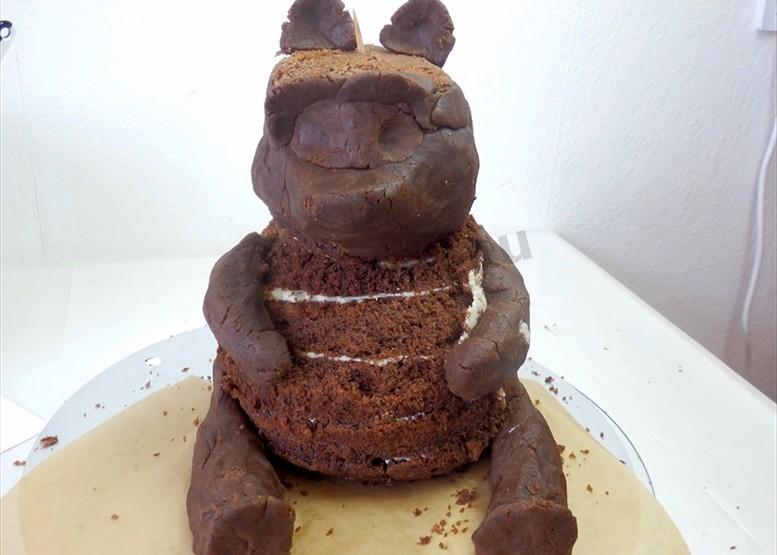
From the left cake and three cut cakes with a diameter of 10 cm in the same way, thinly smearing layer after layer with butter cream, form a head. In this order as in the photo - two smaller, larger cake (it will be a muzzle) and a third small one on top. Both blanks - heads and torsos - are sent to the refrigerator for an hour to solidify.
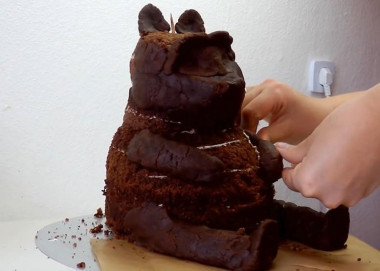
Step 5:

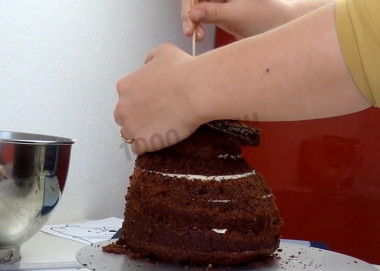
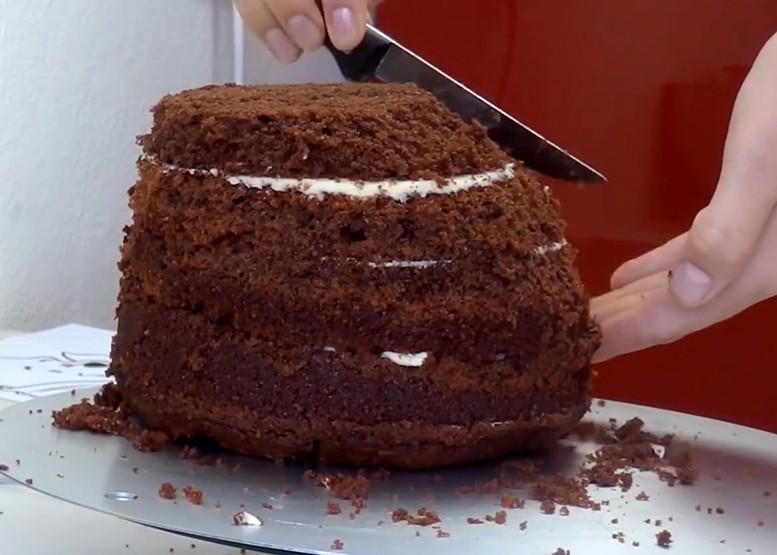
From the frozen larger blank with a knife to form the torso of a bear. For example, you can use a soft toy or an image of Winnie the Pooh.
Step 6:

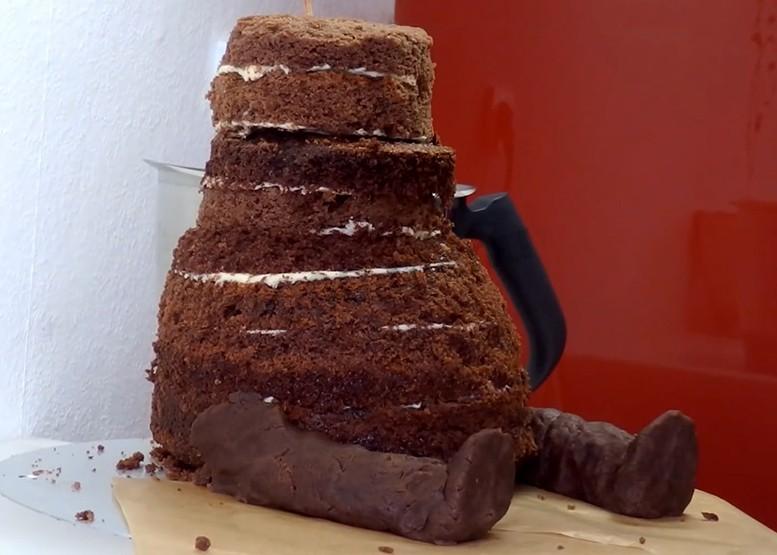
Glue the head to the torso with the same oil cream.
Step 7:
For greater stability, stick a barbecue skewer on top.
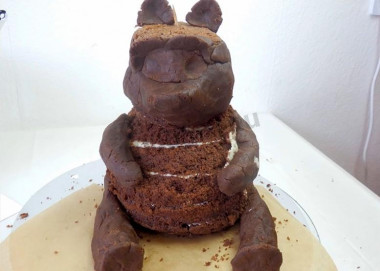
Step 8:

And just like the trunk to form the head and muzzle of the Fluff.
Step 9:

Prepare a pastry putty from all the biscuit scraps. To do this, grind the trimmings with a mixer, or in any convenient way, to a plasticine mass. If the consistency is too dry, add butter.
Step 10:

Mold the putty and place it where the bear's legs need to be.
Step 11:
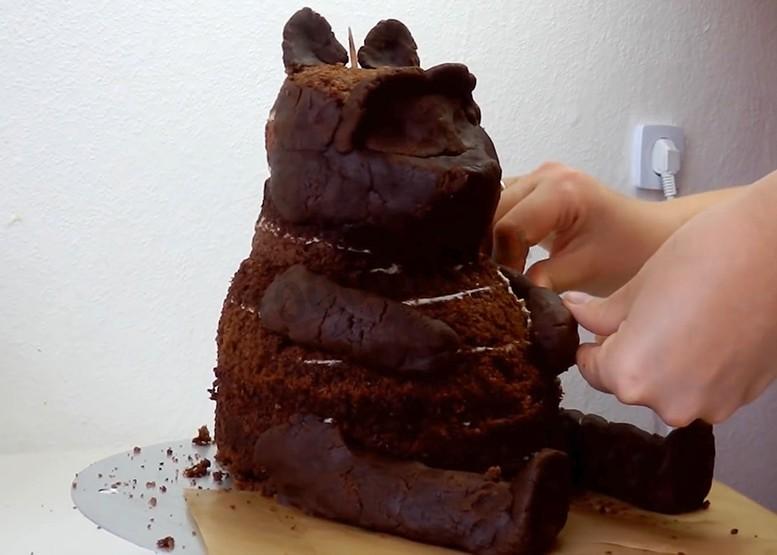
Form a face and ears from putty. Also, sculpt and glue the bear's hands with butter cream.
Step 12:
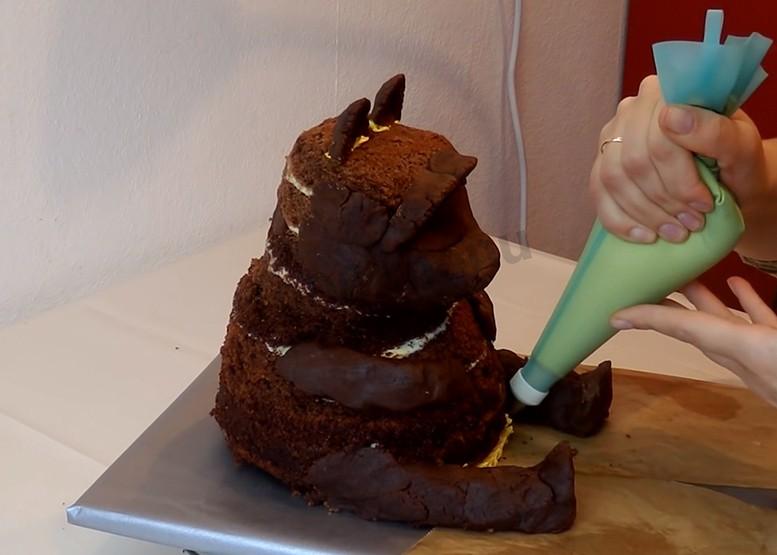
Put the fully formed bear in the refrigerator to freeze. Meanwhile, prepare a protein custard for three proteins.
Step 13:
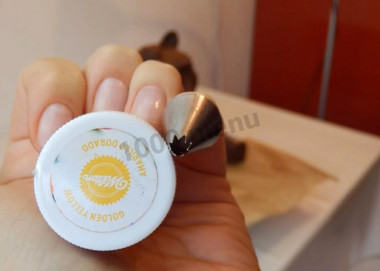
You can decorate with such a nozzle &039;asterisk&039;. Most of the cream should be mixed yellow - for the body. And part of the red color is for the T-shirt. You still need quite a bit of dark cream or melted chocolate in order to draw parts of the face.
Step 14:

When the cream is ready and the cake is frozen, you can start decorating.
Step 15:

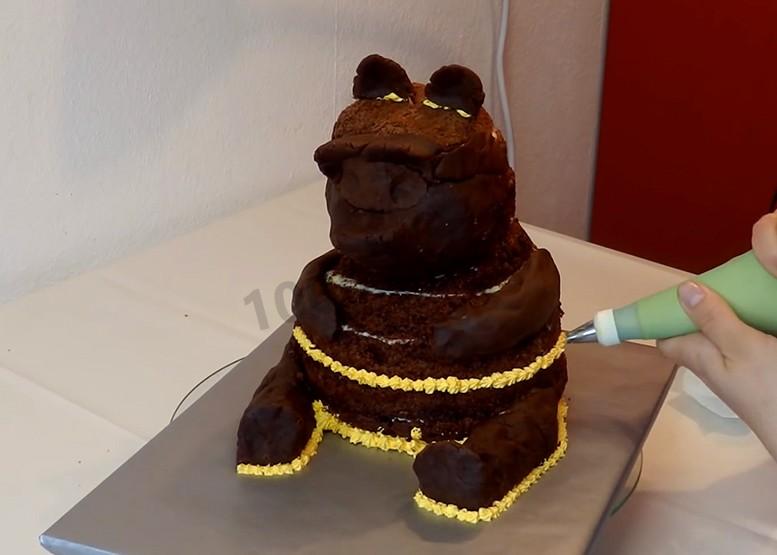
Yellow cream jerky movements first mark the border of the lower part.
Step 16:

Then also decorate it thoroughly and carefully.
Step 17:

And mark and decorate Vinnie's head in the same way.
Step 18:
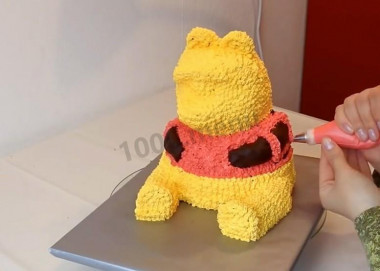
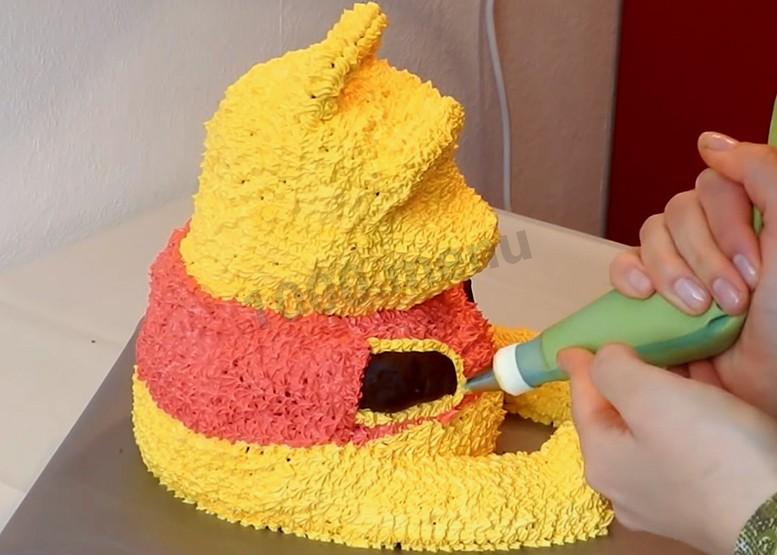
Draw a tank top with red cream.
Step 19:

Decorate your hands with the same yellow cream.
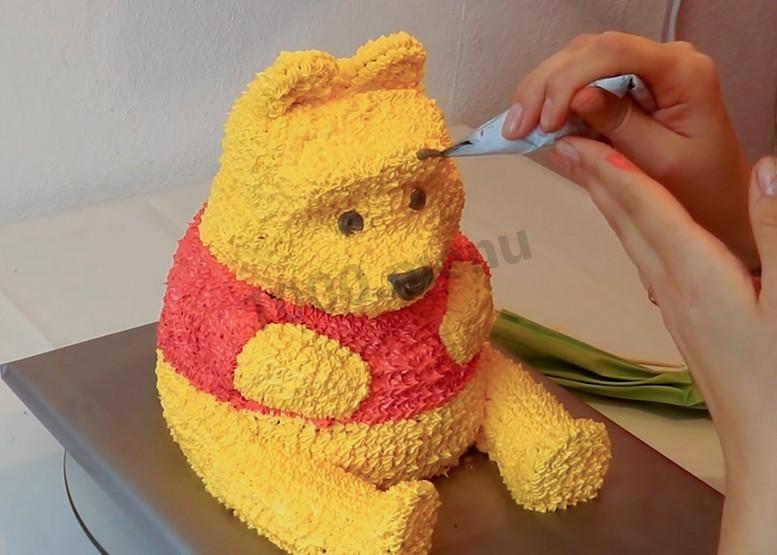
Step 20:

Dark cream or melted chocolate to mark the nose, eyes and eyebrows.
Step 21:
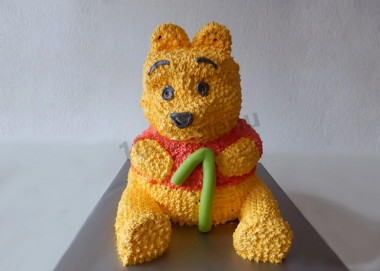
If necessary, put a number, write a name. The cake is ready for the table! Treat and delight your little loved ones. Have a fun holiday!


Caloric content of the products possible in the composition of the dish
- Water - 0 kcal/100g
- Egg whites - 44 kcal/100g
- Food coloring - 0 kcal/100g
- Gelling sugar - 398 kcal/100g
- Sponge cakes - 258 kcal/100g
- Butter cream - 315 kcal/100g