


Composition / ingredients
Step-by-step cooking
Step 1:
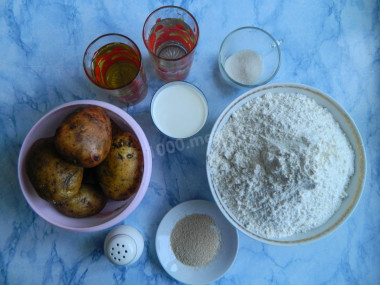
Prepare all the necessary ingredients for making pies. Take the flour of the highest grade. Any odorless vegetable oil will do. Instead of onions and dill, you can take any greens that you like best. Start by making the dough.
Step 2:
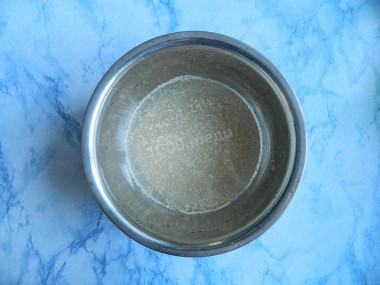
Some yeast must be activated by first dissolving in a warm liquid, others can be immediately added to flour. To prepare the dough for pies, those that need to be activated beforehand will be suitable. To knead the dough, take a deep bowl in which it will be convenient to mix dry and liquid ingredients. Heat the water to a temperature of 37-40 degrees. Dissolve the sugar in it and add yeast.
Step 3:
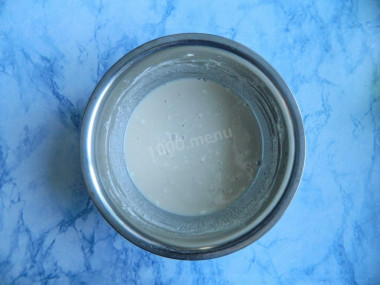
In the absence of a special cooking thermometer, the required temperature can be determined in the following way: you need to drop a drop of water on the inside of the wrist. If the feeling is neutral - not cold and not hot, then the temperature is correct. At a low temperature, the yeast will work slower and it will take longer to cook. At elevated temperatures, the yeast will die, the dough will not rise and the taste of the finished pies will be spoiled.
Step 4:
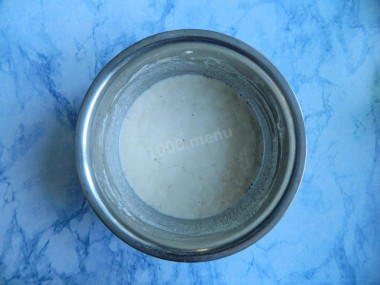
Add 3-4 tablespoons of sifted flour, mix and leave for 10-15 minutes in a warm place. The flour for the dough needs to be sifted to separate small debris and saturate the dough with oxygen and it was airy. When a lush cap appeared on the surface, the yeast became active and you can work with them. Add salt and half the oil. You'll need the rest later. Mix well. The salt should dissolve and the oil evenly disperse over the dough.
Step 5:
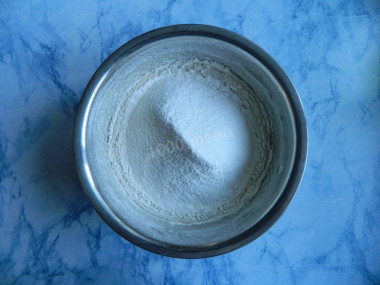
Sift half of the required amount of flour into a bowl. Stir with a spoon until smooth. Sift the remaining flour into a separate container.
Step 6:
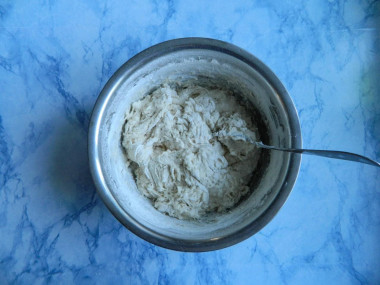
The properties of flour of the same grade, but different manufacturers may differ, to get the desired consistency, add flour in small portions. When it becomes difficult to knead with a spoon, start doing it with your hands. Knead the dough thoroughly.
Step 7:
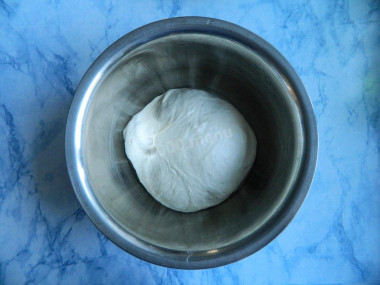
The dough should be soft and tender. Lubricate the bottom and walls of the bowl with vegetable oil so that the dough does not stick to the dishes. Also knead the finished dough with your hands with butter. Cover the bowl with a napkin or towel so that it does not dry and rises well. Leave in a warm place for about 1-1.5 hours.
Step 8:
Peel potatoes and dirt, rinse well. Cut into small pieces of approximately the same size so that all the potatoes are cooked at the same time and quickly. Boil it until tender. It will take about 20-30 minutes, depending on the capabilities of your stove and the potato variety. There is no need to salt.
Step 9:
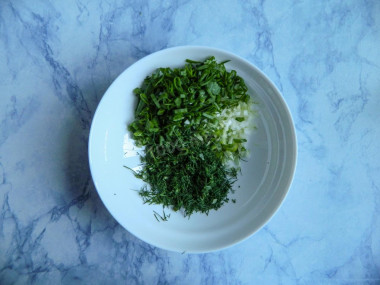
While the potatoes are cooking, remove the wilted parts from the greens and rinse it under running water. Dry it thoroughly with cotton or paper towels. Chop with a knife or blender. I like to see pieces of greenery in the filling, so I do it with a knife. Bring the milk to a boil and immediately remove from the heat.
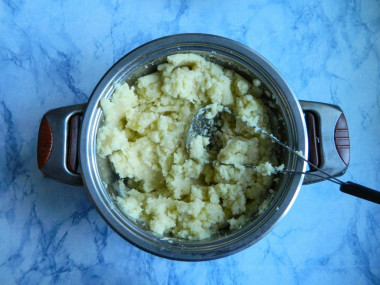
Step 10:
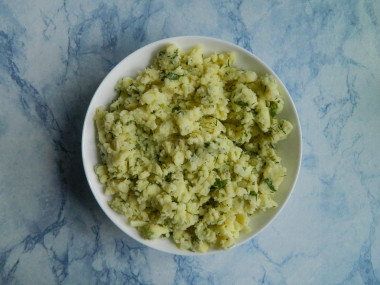
Drain all the water from the boiled potatoes. Add milk and make mashed potatoes with a masher while the potatoes are still hot. It is better not to make puree with a blender, since it turns out to be heavy and very sticky. It will be hard to work with him. Add the chopped herbs, add salt and mix the puree thoroughly until smooth. The filling is ready. Fill the pies with it only when it cools down, otherwise you can spoil the dough.
Step 11:
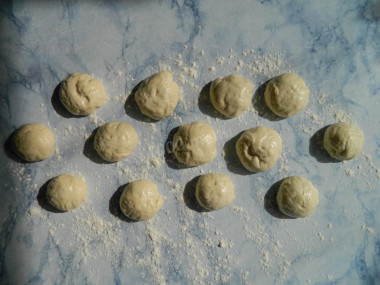
When the dough has increased 1.5-2 times in volume, it is ready and you can start working with it. Separate the pieces from the dough, roll them into balls the size of a large walnut. Place on a horizontal work surface, sprinkled with flour.
Step 12:
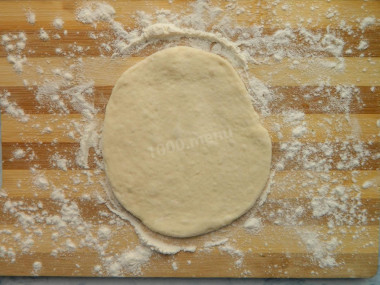
Form the pies. Make pies by greasing your hands with butter or sprinkling with flour. But keep in mind that if there is a lot of flour on the pie, it will burn during the frying process. Roll out the dough into a round layer 0.4-0.5 cm thick.
Step 13:
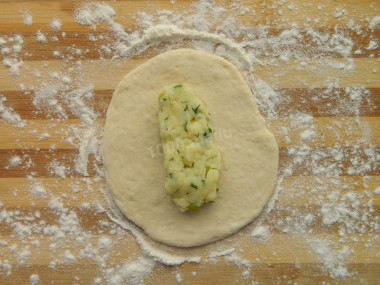
Make an oblong "cutlet" from the filling.
Step 14:
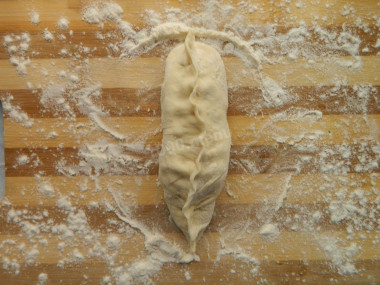
Pinch the dough all over the edge. Gently flatten the patty and place it seam down on a floured surface.
Step 15:
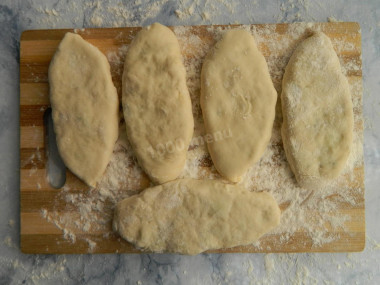
Make all the pies this way. When the first pies rose a little and increased in volume.
Step 16:
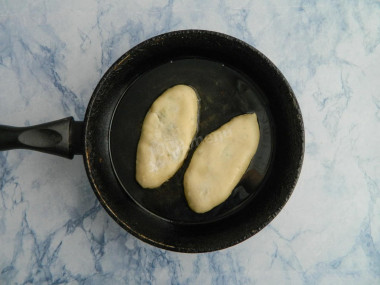
Whatever frying pan you take, pour enough oil so that the pies drown in it by half. Heat the oil over medium heat, because it is dangerous to work with hot oil and you can get burned. In order for the oil not to splash, you can add a pinch of salt to it, it will absorb moisture, if there is any. Check the required oil temperature by throwing a small piece of dough. It should boil.
Step 17:
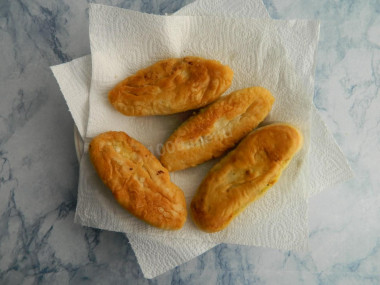
Gently dip the pies into the butter. Fry in a frying pan on both sides until golden brown. Transfer the finished pies to a dish covered with paper towels to remove excess oil.


Important! Using dry yeast, it should be borne in mind that they occur in two forms: active and instant (read the instructions carefully before use!).
Active dry yeast looks like beads or small balls. Before applying them, they must be brought out of the "sleep mode". To do this, the active yeast is diluted in warm sweet water, milk or whey. The formed bubbles, foam or "cap" indicate that the yeast is ready for further use. Active dry yeast must be brought to complete dissolution in the liquid, otherwise, due to the remaining grains, the dough may not rise and the baking will be spoiled (yeast grains that have not dissolved in the liquid and got into the dough will not disperse on their own, which means they will not work).
Instant dry yeast is easier to use. They do not need to be activated before use. Such yeast, along with other ingredients, is simply added to the dough. As a result, the baking time is reduced.
It should also be remembered that both types of dry yeast may differ in their activity from different manufacturers.
Be prepared for the fact that you may need more or less flour than indicated in the recipe. Focus not on the amount of flour, but on the desired consistency of the dough. Read a lot of useful information about flour and its properties in this article!
I really like to cook such pies. Often I make half a portion of potato filling, the second I replace with jam.
Caloric content of the products possible in the composition of the dish
- Ripe potatoes - 80 kcal/100g
- Baked potatoes - 70 kcal/100g
- Mashed potatoes - 380 kcal/100g
- Boiled potatoes - 82 kcal/100g
- Potatoes in uniform - 74 kcal/100g
- Fried potatoes - 192 kcal/100g
- Whole cow's milk - 68 kcal/100g
- Milk 3.5% fat content - 64 kcal/100g
- Milk 3.2% fat content - 60 kcal/100g
- Milk 1.5% fat content - 47 kcal/100g
- Concentrated milk 7.5% fat content - 140 kcal/100g
- Milk 2.5% fat content - 54 kcal/100g
- Dill greens - 38 kcal/100g
- Granulated sugar - 398 kcal/100g
- Sugar - 398 kcal/100g
- Vegetable oil - 873 kcal/100g
- Green onion - 19 kcal/100g
- Salt - 0 kcal/100g
- Water - 0 kcal/100g
- Wheat flour - 325 kcal/100g
- Dry yeast - 410 kcal/100g